
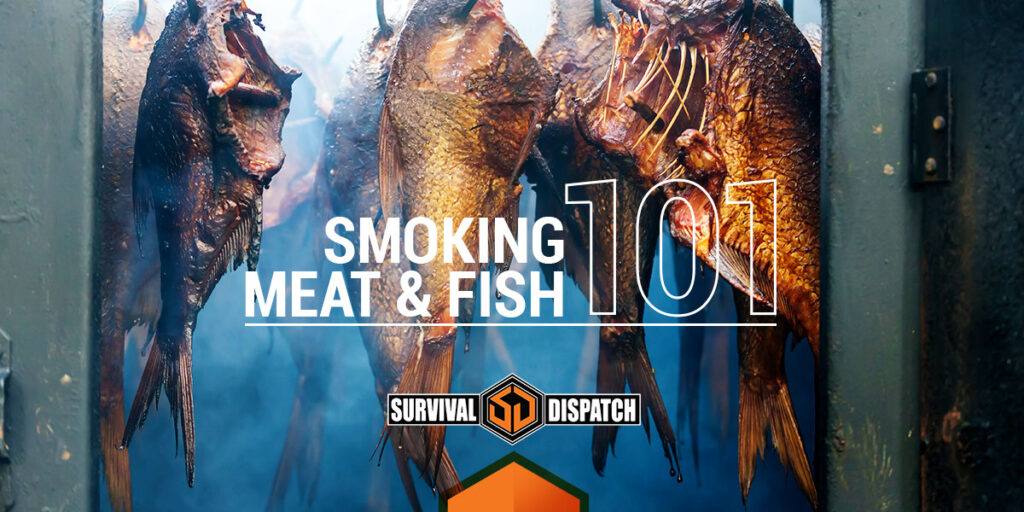
If you’ve ever tried smoked food, you know how delicious they can be, from their rich, complex flavors to their slightly chewy texture. But the technique of smoking food actually has more to do with food preservation than with taste–as history can attest.
Since prehistoric times, smoking has been used by our ancestors to store their meat and fish better. It still works great up to this day. In this article, we’ll share how you can join in on this age-old tradition.
- How smoking works
- Smoking methods
- Smoking materials
- Preparing meat and fish
- How to smoke food
How Smoking Works
Smoke results from incomplete combustion. You can often see this when the amount of damp wood, tree bark, or pieces of fuel you attempt to burn is considerably larger than the amount of heat produced by your fire.
It’s important to note that all smoke is carcinogenic (a cancer-causing agent). But we argue that its benefits outweigh its unappealing health hazard:
- Achieving that smoky flavor — Exposing food to smoke can improve the taste of your food. Chemical compounds like phenols, carbonyls, formaldehyde, other organic acids, and wood alcohols that float up through the smoke create the signature flavor of smoke. These compounds also change the color of food in desirable deep reds.
- Antimicrobial properties — But what really matters is the numerous antimicrobial reactions going behind this technique. Smoking dries food and prevents fungal growth. It can even inhibit viral activity.
More specifically, the smoky substances we listed in benefit #1 kills and weakens many common foodborne pathogens. These include salmonella and staphylococcus.
Smoking Methods
The two main ways to smoke food are (1) cold-smoking or (2) hot-smoking. Either process has the same effect. The only real difference is the amount of heat accompanying the smoke.
Cold-smoking
Cold smoking is intended for long-term food storage. The goal is to dry food, not necessarily cook them.
This process involves forcing cool smoke into an enclosed area with the food for several days up to a week. Make sure the temperature does not exceed over 100F or 38C inside the smoker. Otherwise, this cooks the food.
Hot-smoking
The goal of this process is to heat smoke high enough to cook the food. Hot smoking also opens up the tissues of meat and fish, allowing for faster smoke absorption.
This process involves heating smoke into your “smokehouse” above 150F or 66C. This can be completed in a day. If stored at room temperature, smoked meat and fish can last you a week or more.
Smoking Materials
Other than the food itself, a hot or cold smoke process will need these two items: (1) the box–an enclosed space to hold your food and smoke, and (2) the smoke–produced by fuels.
THE BOX
Smokehouses are tightly-constructed sheds where meat could be hung and smoke would be contained. These were a standard fixture on American farms during the colonial times until the 1900s in rural areas.
Today’s survivalist doesn’t need a dedicated smokehouse to start smoking. Instead, you can start with something smaller.
- Giant crate or cardboard box — Almost anything boxed and closed can turn into a fine cold smoker. All you need is a food rack, door, and pan to place embers and wood.
Place the crate or cardboard box on bare ground. Then, place a food rack that can fit inside the box. Alternately, you can produce a makeshift one by poking metal rods or sticks through the box.
Simply cut a flap inside the box to make the door. Then, place and replace a pan of wood chips and ember as needed on the dirt floor inside the box. As long as smoke is produced, you’re good to go.
- Repurposed outdoor ovens — Since ovens can handle high heat, both hot and cold smoking can be done with this appliance. Simply place your food in the rack, throw in some embers and smoking material in the bottom of the oven, and close the door. Cut the hole in the bottom of the oven if you want to make this contraption more elaborate.
THE SMOKE
Whether you plan on buying from the store or chopping up your own, the general is to soak your smoking chips in water before burning them. This ensures that they produce smoke instead of flames.
Smoking chips to look out for:
- Oak — this gives off a strong and biting smoky taste
- Mesquite wood — these produce a spicy-earthy flavor
- Maple and hickory wood — these produce rich flavors
- Fruit woods — these make a sweet smoke that pairs well with poultry and pork
Smoking chips to avoid:
- Local, toxic species —
yew, black locust, horse chestnut, buckeye, mountain laurel, and rhododendron - Tar-producing resinous woods —
cedar, pine, spruce, cypress, and other need-bearing trees
Prepping the Meat
Prepping will vary depending on the type of meat and its size. But any of these foods can be salted or brined before smoking to extend their shelf life.
- Pork, beef, and venison — prepping these hunks of meat is relatively easy as they’re typically left whole. You can hook and hang them up or lay them on a rack. Make sure you hit these meats with enough heat and smoke according to their size.
- Small fish — Smaller fish can be gutted and smoked whole. Or, if you have fish like trout, you can also cut it up into two filets connected by the tail. Just remove the spine and head and cut along each side of the backbone. Leave the tail untouched. This filet is perfect for hanging up on a pole or rack.
- Medium-sized fish — Similarly, you can also fillet this with its skin left on. Then place the fish on a rack, skin side down for extra flavor.
- Large fish — Cut this up into smaller pieces. Fish like salmon can be cut into “U” or “horseshoe”-shaped pieces. You can hang the pieces on a pole or hooks inside your smoker. The added surface area allows smoke to seep into the cutlets and fillets better.
How to smoke food
Once your smoker and food are all set, it’s time to fire it up.
- Start by burning bits of hardwood like oak. This creates a bed of coals where you can later add on smoking wood chunks or chips to make the smoke.
- Then, place your embers and damp woodchucks of choice inside the smoker.
- Place food in the rack or hang them up with a hook or clip.
- If available, place a thermometer inside the smoker. This ensures accurate readings when you conduct your occasional temperature checks. Best if you have one when the gauge is outside, but the probe can stay inside to avoid loss of heat and smoke.
- Lastly, wait and monitor the temperature. The waiting time and temperature will depend on the smoking technique chosen.
- Hot smoking takes less than a day. Once a pasteurization temperature is reached–150 F or 66C–the food is cooked, and the process is done.
- On the other hand, cold smoking can take several days to a week. Make sure the interior of the food does not exceed 100F or 38C for a significant period. Otherwise, this will cook the food and allow spoilage. Keep the number of embers low and replace them as needed.
While the latter process takes much longer, cold smoking is ideal for long-term food storage. But regardless of which smoking method you decided to do, cure the meat and fish with salt beforehand can produce food that lasts for many weeks at ambient temperatures.