Bottom Line Up Front (B.L.U.F.)
– Consider how extreme cold affects every layer and module of your kit. You need to change out more than just what is in your bugout bag (BOB) to stay warm and comfortable.
– Just as a bugout bag ensures what’s needed is in your pack, a turnout bag ensures that you have what’s needed on your person.
– At northern latitudes, summer equipment falls short in winter. Ready your pack each fall and spring.
– MRE heaters and hot beverage bags can be used to warm you like a hot water bottle.
– Space blankets only reflect heat, they don’t make it. Use them early on or you will just be insulating a popsicle.
– Learn to build a greenhouse shelter and carry supplies on your person.
– Metal canteens can freeze to your lips in winter.
More Than a Bugout Bag
You’ve seen it a million times in movies and frequently parroted by the space shuttle door gun qualified crowd online. When it’s time to bug out, our hero (already wearing full battle rattle because that’s how he watches TV and sleeps…) grabs his 5-pound fast light bugout bag. Of course, then he uses superhuman fitness and other-worldly tradecraft that the JB’s (Jason Bourne, Jack Bauer, and James Bond) would envy to E&E his way to his island safe house. So, what about the rest of us?
Imagine it just happened … The big one … The event you have been preparing for all this time. Your radio squawks to life causing a massive adrenaline surge that jolts you from a sound sleep. You leap out of bed and sprint to your pack. Hefting the ruck to your shoulders, you jog to the rally point for a quick head count and to decide which of several plans to use. As scenarios race through your mind and you consider the available information, the realization hits … “Ah! I forgot my ____!”
Sound familiar? Everyone has forgotten an important article at some point. I sure did on my first bug out drills and activations as a first responder. It’s a terrible feeling to have put so much energy into preparation and then forget something important.
Remedy? Using a turnout bag was a definitive fix for me. A turnout bag is a bag that contains everything you need to respond to an emergency. The system is simple. Once the bag is empty, you are properly dressed and have everything in your SSR (Survival/Self-Recovery) Core Layer. Then you can deploy confident that nothing has been forgotten.
IN ADDITION TO MY BUGOUT BAG, MY GEAR ALSO INCLUDES A TURNOUT BAG AND A GO BAG:
Turnout Bag
Keeps clothing and EDC, including Survival/ Self-Recovery Core Layer equipment together in one place. Create a turnout bag for each primary role, mission, or threat that requires a different uniform or substantially different clothing, e.g. first responder uniform vs. everyday urban camouflage. Create separate turnout bags, ensembles, or modules for primary environments or climates as needed, e.g. covert camouflage (urban camouflage) vs overt camouflage (wilderness camouflage), cold-weather and so on.
Go Bag
It’s important to carry at least minimal survival gear on your person, but there will be times when a pocket-sized pouch or tin of miniaturized gear seems wanting when compared to the present situation. Severe winter weather is one of those times and a situation where the go bag shines.
The go bag is also referred to as an E&E, SERE, get home bag, or bail out bag depending on the context and who you ask. Depending on my needs at the time, I can configure the go bag for carry or wear as a satchel, waist pack, pack lid, pack, pouch or briefcase. It enables me to quickly separate lifesaving equipment from my sustainment load if the situation dictates that I doff my ruck.
I keep a survival kit that can be carried as a satchel or buckled to my bugout bag as a detachable module. My ruck gets stowed when I climb into a vehicle. However, I detach my go bag then wear it or carry it on my lap. This improves the chances I will be able to hang onto it should an emergency occur in transit.
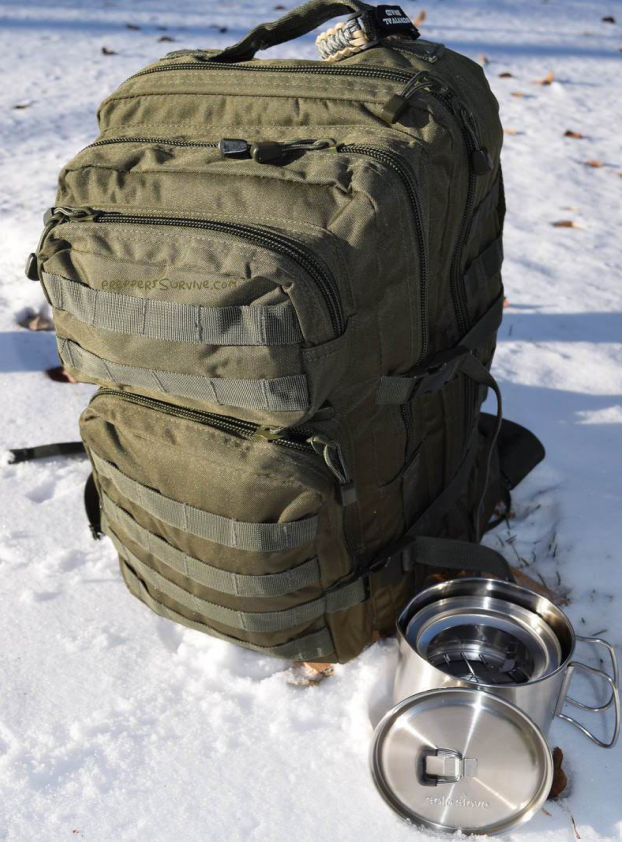
Bugout Bag
Main pack carrying the sustainment load. See other blog posts for what should always be in your bugout bag.
Swap Gear Fall and Spring
As fall arrives each year, I prepare my kit by swapping lightweight warm weather modules to bulkier cold weather modules and ensembles. Then I add cold weather specific components. I’ll address them by the layers of my kit.
Turnout Bag
Clothing
• Trade Socks in Skivvy Roll – Skivvy rolls are a compact way to pack your next to skin layer. If you don’t know what they are, look them up. The only change I make to the skivvy roll in each turnout bag is to swap summer socks for warmer winter ones.
• Add Skivvy Packet – A base layer will stretch out your socks when packed in a skivvy roll, so I pack them separately. I add a skivvy packet to the skivvy roll in each turnout bag.
o FR Base Layer Top
o FR Base Layer Bottom
o FR Lightweight Balaclava
o FR Glove Liners
• Swap Unlined Trousers for Lined Trousers – I swap unlined pants for lined ones to take the edge off the wind chill.
• Swap Unlined Long-sleeved Shirt for Lined – Just like lined trousers, a lined shirt traps more dead air space keeping you warmer than a summer weight one.
• Add Bottom Mid-layer & Suspenders – A common mistake when layering for cold weather is to add top layers but not bottom. Insulation from the waist down is essential. Your legs and backside are more often in contact with snow and the ground. They need insulation or you will lose heat through conduction.
o Add Top Mid-layer
o Swap Top Outer Layer
o Add Bottom Outer Layer
o Swap Uninsulated Boots for Insulated Boots – Amount of insulation will depend on how cold it gets. Taller boots also help keep snow outside where it belongs.
• Gaiters – Helps keep snow out of your boots and laces.
• Ice Cleats, Crampons, or Traction Device – I use YaxTrax Pro on my boots to keep in an upright position when a dusting of snow hides patches of ice.
• Add Mid-layer Balaclava – I always carry a Drymax FR Balaclava in my go bag and skivvy packets, but need another layer in winter.
• Add Watch Cap
• Swap Summer Gloves – for a Layered Winter Glove System
• Ice Spikes – Ice spikes are a pair of small handles with protected spikes that can be stabbed into ice to aid in self-recovery should you fall through ice. Run a cord through the arms of your coat and across your back. Attach the cord to glove or mitten shells so they don’t get dropped in the snow or lost when pulled off for increased fine motor manipulation. Ice spikes can be attached to the same cord.
Core Layer Survival/Self-Recovery Gear
• Extra Potassium Permanganate – This useful survival chemical is great for signaling on snow and has many other uses.
• Extra White Petrolatum – To pre- vent and treat windburn/chapped lips. Makes a long burning fire starter when mixed with medical cotton. Also brings dried out tinder tabs and simi- lar tinder back to full efficacy.
• Clear Poncho – Simply put, you need more shelter in winter. I carry an emergency bivvy bag, a 1.5 mil aluminized polyethylene emergency blanket, cordage, and duct tape all year round. I add a clear emergency poncho in winter to build a greenhouse shelter. It’s basically a sealed A-frame lean-to with a vertical clear wall and a sloped, reflective back wall. Heat radiated from a long trench fire with reflector penetrates the clear wall and is reflected from the back wall. Then this creates a greenhouse effect.
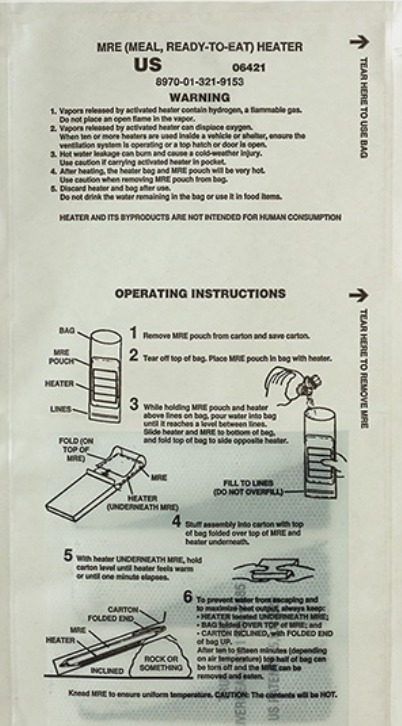
• Add MRE Heater – I carry modified MRE hot beverage bags all year around. I modify them by reinforcing corners with tape and adding grommets. Add an MRE heater to the core layer in winter to create heat and make a warm sugary drink. This is good for bringing me back from the brink of hypothermia and for getting fine motor coordination back. Space blankets can only reflect heat created by your body. They cannot make heat. If you don’t use them in time, you’ll not have enough heat to reflect back. This will mean you’re just further insulating a human popsicle, so use them early on and bring a way to generate heat if you cannot get a fire going. An MRE heater and hot beverage bag can be used like a hot water bottle to warm you in an emergency.
• Swap Beeswax Candle for Tallow – Tallow candles are edible, but I don’t carry them in summer because they have a lower melting point. I don’t want a stinky mess in my kit.
Go Bag
• Larger Candle – I add a larger multiwick candle in a tin in the fall. It’s like a little mini camp fire I can huddle over under my poncho.
• Add Extra Handheld Flare Fire Starters – Essentially a mini road flare, they require little fine motor coordination to use. This is important in cold weather as fine motor coordination degrades as hypothermia progresses. These flares burn furiously for 7 minutes or so, which is plenty of time to dry out soggy tinder.
• Insulation for Canteens & Bladders – Helps keeps soups or drinks warm. Also keeps your water from freezing.
• Canteen or Water Bottle with a Plastic Mouth – I carry this year round but since so many bushcrafters carry them, it’s worthy to note that metal water bottles can freeze to your lips. Unless you want to end up like the kid in “A Christmas Story” when he licked the metal pole in winter, consider a canteen with a plastic mouth.
• Cold-Weather Module to Survival Rations – In fall, I add a cold weather module to my survival rations. This consists of MRE heaters, modified hot beverage bags, hot cocoa, extra Herb-Ox® bouillon/gravy base, and sugar. Once your body stops shivering, you’ve used up available sugar and it’s downhill from there.
• Extra Chemical Hand & Body Warmers
• Extra Solid Fuel Tablets
• Hex Head Sheet Metal Screws – I screw them into the bottom of my boots for added traction in icy conditions if I don’t have cleats.
• Snow Claw – A snow claw is a flat plastic or aluminum snow shovel with handholds instead of a handle. It can also be rigged as a snow anchor or two can be used as snowshoes. It’s small and light enough to fit in my go bag. It also adds structure to the bag like a frame.
Bugout Bag
• Hypothermia Thermometer – A thermometer that reads lower temperatures is needed to detect hypothermia.
• Extra Clothing, Especially Skivvy Rolls & Skivvy Packets – Even if you’re great at layering and controlling your activity level to avoid sweating, emergencies require extra effort and that results in sweat. Changing out of soggy next to skin and base layers may seem like a small thing sitting in front of a computer, but the feeling is indescribable when you’re freezing in the field. It breathes new life into you and greatly improves morale.
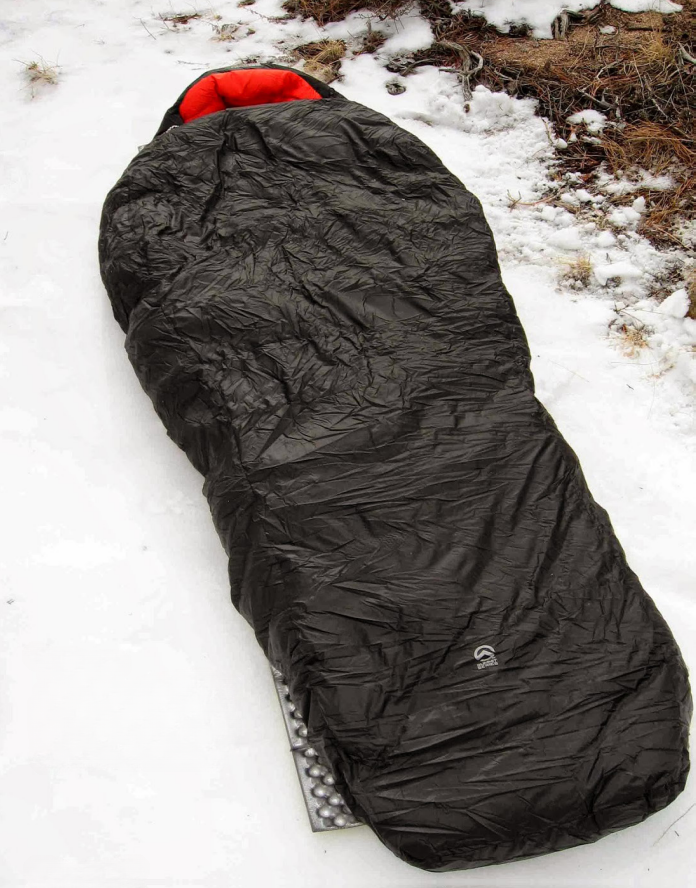
• Sleep System – My sleep system has inner and outer bags with a Gore-tex® bivvy. I use the entire system together in winter and remove layers to reduce weight in summer.
• Snow Knife – Useful to construct shelters in snow.
• Tent with Wood Stove & Stove Jack – A couple of the lighter models are made by Kifaru and SeekOutside. A heated shelter makes all the difference in winter.
• Axe or Tomahawk – Useful to make holes for ice fishing.
• Snow Shoes & Trekking Poles with Snow Baskets – Provide stability and traction on icy ground and make movement possible where it otherwise wouldn’t be.
• Snow Shovel – A lightweight, collapsible snow shovel is a must in winter in my neck of the woods.
• Overwhites & Snow Camouflage
• Extra Fuel – Melting ice for drinking water and bringing it to a boil requires additional fuel.
• LRP/CW Ration Entrees – Made specifically for long range patrolling and cold-weather, LRP/CW rations contain more protein, fat, and are higher in calories than regular backpacking meals. They also pack better since they are cube shaped.
• Cold-weather Remote Battery Compartment – Shooting in extreme cold takes experience and skill. Weapon systems designed to function in the cold are more effective at low temperatures and the various incarnations of the Dragunov SVD were designed just for that. The optics incorporate a remote battery compartment that clips inside the shooter’s coat. This prevents the batteries from getting so cold that the lighted reticle ceases to function.
• Slick or Sled – A slick is a lightweight sheet of plastic that rolls up into a tube. When unrolled, it makes a great sled to skid out a deer. It can also be used to haul gear in snowy conditions, which is good because cold conditions require additional equipment. A slick or sled can also be used to beef up your shelter with a windbreak or as a roof on a snow trench.
Conclusion
Make sure you take the time to switch out your gear for cold weather. There’s no point in having a completely outfitted kit if you’re just going to freeze to death. Be sure you’re customizing your gear for the unique conditions where you live.
This article was originally published in Survival Dispatch Insider magazine Volume 1 Issue 4.
=====
Become a Survival Dispatch Insider …
We bring together survival enthusiasts and preppers to share skills and knowledge, so you can enhance your preparedness for emergencies and ensure the safety of you and your community.
The Results You’ll Get …
Our community, courses, and memberships are pretty special. We’re focused on the ways it will make a huge difference in your life.
Here are a few of the things you’ll be able to do as a member of Survival Dispatch Insider …
1) Improve your emergency preparedness by learning survival skills and strategies from experienced preppers.
2) Build lasting connections with like-minded individuals that share your passion for safety and readiness.
3) Access a wealth of knowledge and resources to assist in protecting you and your community during unexpected situations.
Click HERE to get started.
=====