
SDN has moved!
Subscribe to our new @SurvivalDispatchNews YouTube channel
When stranded in the wilderness and forced to survive, you typically have minimal gear. This means that knowledge and natural resources are your best friend. It’s vital that you stay calm, then assess your situation and prioritize. You need to have a way to get warm and dry. Fire can be difficult without the right tools and you should typically wait until just before dark anyways. You can, and should, start on a shelter right away.
Sometimes building a shelter might take all day and other times it will go quickly. I’ve had shelters take 12 hours to build, and others that I put up in 15 minutes.
What Has Worked For Me and What Hasn’t
For my first survival challenge I built a wooden frame, put down a layer of flat leaves like shingles, and then layered bundles of grass. The problem was that I built it too far off of the ground. I spent all day making a perfect waterproof roof that didn’t keep me dry because of the height.
When it started to rain and hail, the 30 mph winds blew it right into my shelter. I was sleeping on the ground because I didn’t have time to make a bed. My fire was put out within a few hours, only an emergency blanket saved me from hypothermia.
The only equipment I took on my wet weather challenge this year was a knife. There was heavy rain in the forecast, so I needed a good shelter right away. I also knew a fire wasn’t going to happen.
To start my shelter, I found an old apple tree that created a natural canopy to block most of the rain and wind. There was brush growing up around the edges that created another barrier. I cut down a small maple for a ridge pole and wedged it in the crotch of two trees. This time I kept it low to the ground, about 4’ high.
I cut a bunch of smaller branches to create a frame for the lean-to and rested them on the ridge pole at 45 degrees. Then I pulled piles of dead grass from the area and piled it on the roof about 1’ thick.
I used the remaining grass for a bed. This shelter took me about 90 minutes to complete. It kept me dry through several days of pouring rain.
You can find dozens of different types of elaborate shelter designs with some research. However, most of them don’t make sense for a normal survival scenario. You don’t need a big fancy shelter to make it a few days or even a few weeks.
Once you’re in the field, you’ll be able to come up with your own design for that specific challenge. I’ll go over some specific designs for you below, but remember that small, strong, and simple is always better.
Shelter Basics
There are a few general rules you should always follow no matter what shelter design you choose.
1) Be selective on your location
It absolutely blows my mind how many times I see a survivalist build a shelter only to get flooded out at night or consumed by insects. I typically look at a minimum of three separate locations for a shelter before I make a decision.
No matter how nice a site you think it is, there could be a better one just over the hill. Look for a flat area that is either on the side of a hill or at the top. It’s much easier to build a functional shelter on flat ground.
Never build on low ground or close to a body of water. If possible, find a spot that is clear of rocks and ground vegetation because less work is better. There should be plenty of building materials in the nearby area, with the majority being dead or downed trees. Also be aware of wind direction and sun location.
2) Limit energy and resources
I often see survivalists using dozens of feet of cordage to build a shelter or they spend hours sawing down poles. There is no need to go through all that. All this does is burn a bunch of calories, risk injury, and use up resources. It’s much smarter to limit these activities.
Use downed poles for framework. Use two tree trunks to break poles instead of sawing or breaking them with your foot. Find a way to use gravity to hold your framework together instead of using a bunch of cordage.
Be creative with your angles to make this work. Use existing trees instead of burying poles in the ground. There is no need to dig when you can find two trees at the appropriate distance apart.
3) Smaller is better
Don’t fall into the trap of thinking that a spacious shelter will be more comfortable. First, you have limited time and energy available to build. You may not finish your shelter by dark if you go too big. It’s better to build a small shelter and then revise it later if needed.
Second, the more space to heat inside the shelter, the colder you will be. Whether you are heating your shelter with a fire or with body heat, the goal is to be warm and toasty. This doesn’t work with large shelters.
Third, you should always prioritize the quality of your shelter. For example, if you save time by building a smaller shelter, you can make the roof and walls thicker to withstand more wind and rain.
4) A bed matters
You need to get off the ground. The ground sucks more heat out of your body than the air above you. In many cases, getting off the ground is more important than having a roof over your head.
It’s important to get off the ground!
You should always have at least 4” of compacted insulation underneath you. Keep in mind that 1’ of leaves will compact down to 2” when you lie on it. You can also build a platform or make a hammock to get off the ground.
5) Consider the elements
The shelter design should be specific to your scenario. If you are in an area prone to rain, you absolutely must focus on a waterproof roof and getting off of the ground.
If you are in an especially cold area, you need to focus on insulation. Think about whether you want your fire inside the shelter or outside.
Don’t forget that a fire inside requires good ventilation to prevent carbon monoxide poisoning. If it’s hot at night, you may want to opt for a more open shelter with some air flow. If it’s really windy, you will want strong, thick walls to help block the wind. Don’t forget about thick walls to keep away predators or a platform to avoid insects.
Shelter Types
There are just a few basic types of shelters that I suggest you learn. You can always start with these principles then get more complex as needed.
1) Natural Shelters
I highly suggest that you use the features of the area to help make your shelter design more solid and simple. For example, I once found a rock jutting out of a hillside and built a lean-to up against it. This made it more stable, required no ridge pole, and gave me a heat reflector for my fire.
In some cases you can use a rock face, a fallen log, or live trees to help with your structure. Sometimes you can get an entire shelter out of natural features.
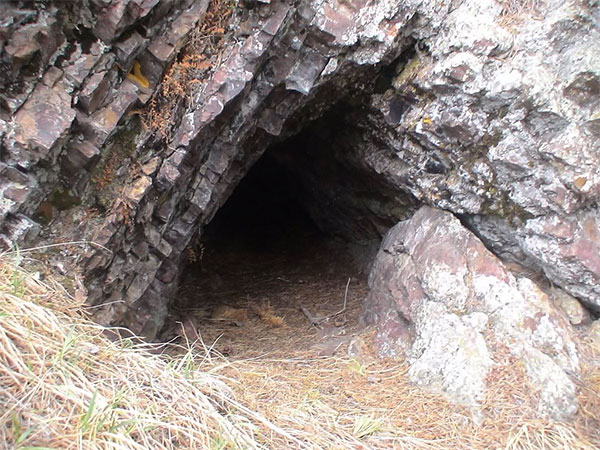
Caves can be good to get out of the wind and rain, but other animals will likely use them for that reason too. In addition, the floor of the cave is typically wet and hard for sleeping.
Never build a large fire inside a cave as the heat can cause the rocks to dislodge and fall on you. In deep snow you can climb down under the boughs of a spruce tree. The spruce boughs keep the snow out from around the base and the needles give you a soft, dry bed. Also, the overhead boughs keep snow off of you.
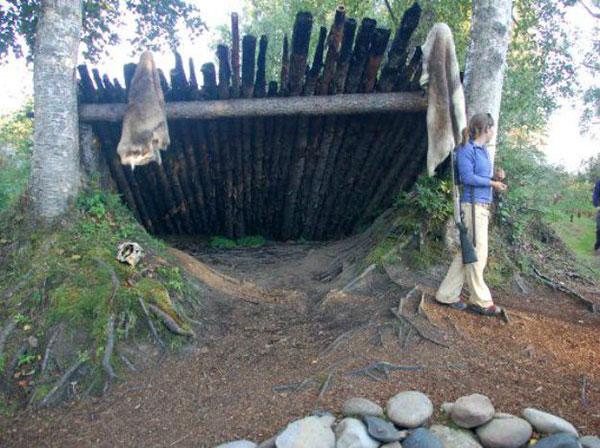
2) Lean-To
This is by far my favorite type of shelter because of its simplicity. It can also be combined with other building elements to make it more functional.
Start by finding two trees about 10’ apart. Get a long ridge pole and either rest it on branches or tie it anywhere from 3’ to 6’ high depending on the size of your lean-to. Gather lots of shorter, thinner poles and lean them at a 45 degree angle against the ridge pole.
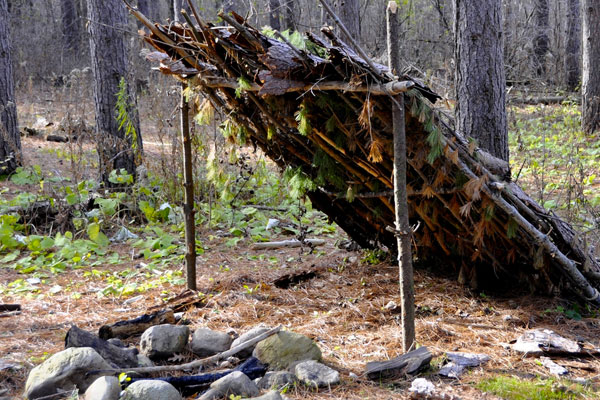
Pile insulation on top of the roof starting at the base and shingling it up from there. The thicker the better, I’ve seen some with as much as 4’ of leaves piled on top. Add a soft bed underneath and you are finished.
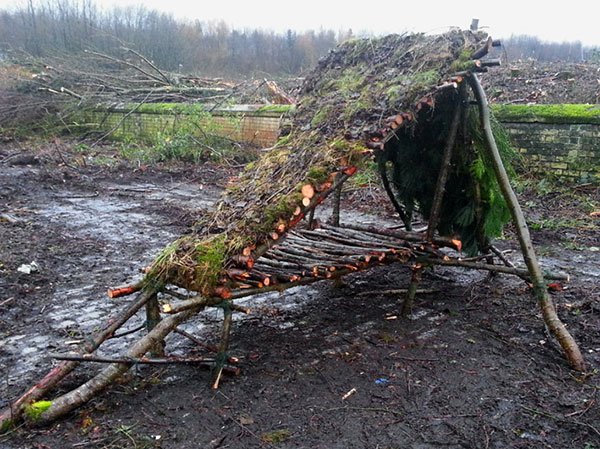
3) Debris Hut
This shelter is designed for scenarios in which you will not have a fire. it’s basically a large, natural sleeping bag to keep in your body heat. Take two 4’ poles to make an A-frame and drive it into the ground. Then use a ridge pole that is 8’ to 10’ long and rest the end on top of the A-frame.
Collect lots of shorter, thinner poles and lean them against the ridge pole on both sides at a 45 degree angle.
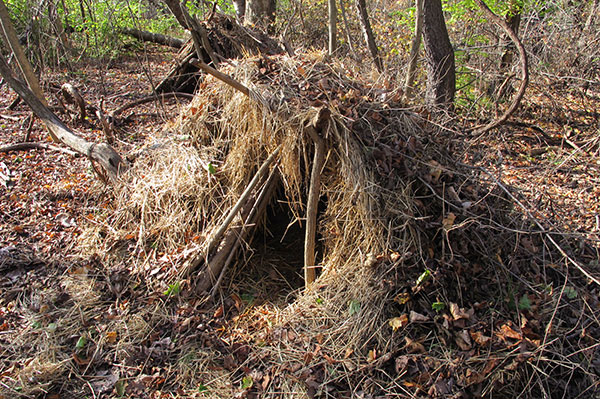
via exploretruenorth.com
Add a bed inside then pile several feet of additional insulation on top of the shelter until it forms a large dome. You can use a pile of leaves as a door or use your hiking pack if you have one.
4) Snow Cave
This shelter is designed for sub-zero weather with several feet of snow. You often can’t find the resources you need to build a shelter in these conditions, so the snow itself is the best option.
ou will either need to find a drift or manually pile up the snow so it’s at least 4’ tall. Dig down to ground level and dig out a door just large enough for your body. Next, collect several sticks about 6” long and drive them straight down into the top of the drift every few feet.
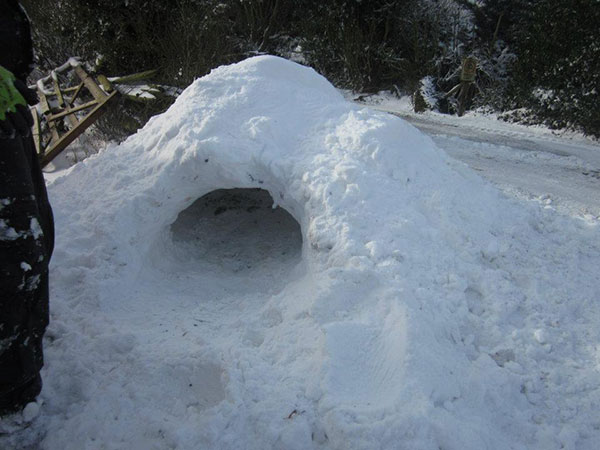
These sticks warn when you are digging too close to the top and could cause a cave-in. Dig out your chamber so it’s large enough to get inside, turn around, and lie down.
You should then build a slightly higher shelf for sleeping. The cold air will sink to the bottom keeping your sleeping shelf warmer. You can use your pack for a door but the snow you removed from the inside will likely block most of the wind.
Final Thoughts
Building shelters for survival is all about practice. You never want your first time building a certain type of shelter to be when your life depends on it.
Even my four year old son uses blankets and broomsticks to build survival shelters in our home. Whether you practice in your backyard or on camping trips, it’s vital that you take the time to try out these designs.
Attention to detail makes a large difference, from the thickness of your bed to the stability of your ridge pole. Keep in mind any help you can give yourself, the better.
Try to keep a tarp or emergency blanket with you to make building a shelter that much easier. These measures, along with practice, could save your life.
=====
Become a Survival Dispatch Insider …
We bring together survival enthusiasts and preppers to share skills and knowledge, so you can enhance your preparedness for emergencies and ensure the safety of you and your community.
The Results You’ll Get …
Our community, courses, and memberships are pretty special. We focus on the ways it will make a huge difference in your life.
Here are a few of the things you’ll be able to do as a member of Survival Dispatch Insider …
1) Improve your emergency preparedness by learning survival skills and strategies from experienced preppers.
2) Build lasting connections with like-minded individuals that share your passion for safety and readiness.
3) Access a wealth of knowledge and resources to assist in protecting you and your community during unexpected situations.
Click HERE to get started.
=====