
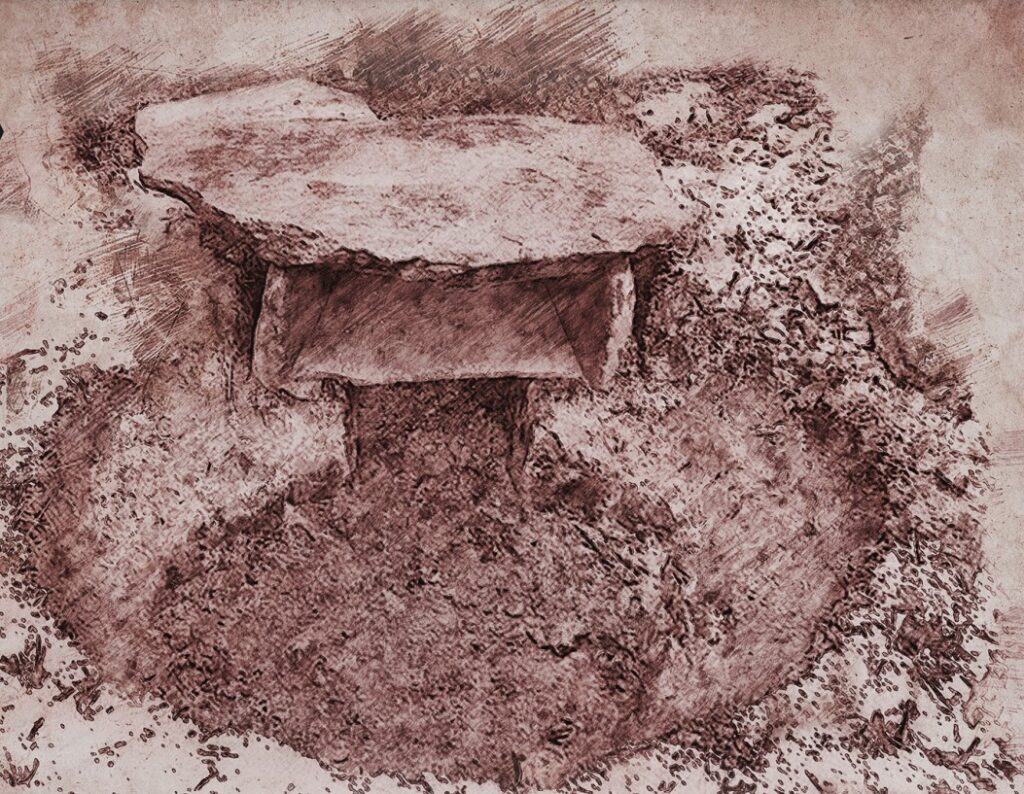
 The first time I saw this oven in all its glory was during a primitive skills rendezvous, built by one of the masters of primitive technology, Steven Taylor (aka Snow Bear). And despite being made from a pile of dirt and rocks, this humble oven was clean, streamlined and very efficient. It consisted of a round fire pit dug into the ground. From this pit a trench extended. A stone cooking box straddled the trench and a stone chimney rose up behind it. All of the dirt that was excavated went into a smooth mound that covered most of the stone box. With a fire built inside the pit and partially up the trench, the chimney was able to pull a draft and heat up the stone box.
At first blush, it may seem complicated to build and it may even seem like overkill (since you could also just cook over an ordinary open fire). But a little bit of work pays off quickly when you create this primitive (yet sophisticated) cooking set-up, because it’s one of the most versatile cooking hearths I’ve ever used. Here’s how to build your own dirt mound oven.
If You Build It, They Will Eat

Get started by gathering a few things. Grab a shovel or a digging stick to dig the hole and the trench. You’ll also need to collect an assortment of rocks from a high and dry location. Never collect your “fireplace” rocks from around waterways (especially rocks that are at or below the water level). The stones can harbor water deep inside and explode violently when that water turns into steam.
Next, you’ll want to plan out your pit and trench dimensions. The overall outline of the two shapes should resemble a key hole or a mushroom. You can dig your pit either round or oval in shape. It can be roughly two feet across and approximately one foot deep. The trench will connect to the pit, being about 10-12 inches wide, one foot deep and about two feet long. The trench width can vary a little, but in any case, it needs to be narrow enough to support the stone box you will build, without being too constricted for smoke and heat to move through. Aim the trench parallel to the prevailing wind direction, and dig the round pit upwind (so it acts like a funnel to catch the wind).
Hopefully, the local geology is generous and you are able to find a few flat rectangular stone slabs. One of these will be the floor of your oven, and it will need to span over the trench. Using additional rocks, and possibly some mud as mortar, pick the best size and shape of rocks to create two side walls and one rear wall on top of your flat rectangular rock. And if possible, wrangle up another flat stone to act as a lid for the stone box. Keep in mind, you’re only building five of the six surfaces of the box. There will be one wall open, facing the fire pit. This could be closed off with a stone for a door, but it is generally left open to accept the heat from the pit.
Once your stone oven box is complete, you can build a chimney behind it. This will sit over the end of the trench, allowing the hot air and smoke to run under the stone box and up behind it. You can use the rear wall of the box as part of your chimney (which will add more heat to the box). Your chimney can be square, circular or any shape you like. You can build it with stone, using mud as mortar to seal the gaps (you could also use mud alone, if you don’t have much stone to work with).
Make your chimney about 6 inches taller than the oven box, as this will help it pull a draft. This draft is very important, as it is not in fire’s nature to burn sideways unless there is ample air movement. Without the air flow, the fire will only burn well in the pit and not burn well in the trench. We need the trench to heat up since this provides heat to the floor of the oven.
With all the stone work done, you can create the dirt mound by using your excavated soil to bury the oven box and cover around the outside of the chimney.

Fire It Up
With the excavation and building complete, now all you have to do is light it up! Build a tipi fire in the round pit to make some coals. These coals will be necessary to keep the pit fire burning and spread fire into the trench.
Use one of your pieces of firewood to move some coals up into the trench and feed the coals with some small dry sticks. This should begin to create flames going down the trench. When the draft begins to pull, you’ll see smoke from the chimney and you might notice flames if you peek down the chimney.
With all of this heat moving through the trench and up the chimney, the stone box will begin to get hot. You could place your food in the oven now, or wait until it gets hotter. It’s up to you and it depends on your food items.
Once the oven is well heated, your food will be receiving warmth from the stone floor of the oven box and from the radiant heat of the fire in the pit. Regulate the heat by increasing or decreasing the size and placement of your fire (in both the pit and the trench).
Cook a Feast
The versatility of this set-up really starts to show when you start cooking multiple things at once with your dirt oven. The oven box is a big focal point and it should be. You can fry or bake things in the stone box, just like a griddle or oven. You can also set up a rack or a spit over the round fire pit, to cook over the open fire.
As a finishing touch, I’ll often place three pyramidal stones around the chimney top, so that I can set a pot, pan or griddle over the chimney without blocking off the air flow. You can set up a tripod over the chimney and hang up some jerky to smoke. Place a rack over the fire pit and grill. Or do it all at once. Just keep your fire burning steady and keep it company. Let someone else go out for firewood, since you never want to turn your back on a cooking fire. Enjoy!