
For decades our grandmas, and their mothers before them, canned produce, soups, chili, and pretty much any perishable item you can think of right in their own kitchens. They didn’t run to the store and pick up a few cans of commercially processed food to serve to their families. They grew the food themselves or visited farmer’s market or their neighbors and carefully picked the best out.
Home canning is a lost art that absolutely must be brought back for many reasons. It’s an excellent way to create a handy stockpile of food in case of emergency. It is far less expensive for you to preserve food in your own kitchen instead of buying it at the store. You also get the comfort of knowing exactly what is in every jar on your shelf.
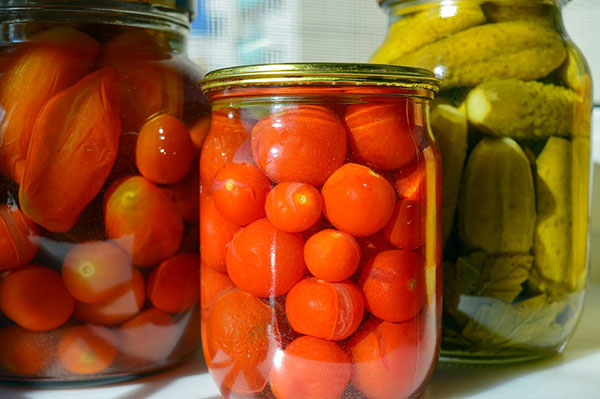
You may assume you are limited to canning vegetables, jams, and a few fruits, but that isn’t the case at all. You can preserve your favorite soup recipes, chili, stews, and even things like chicken breasts, bacon, and hamburgers!
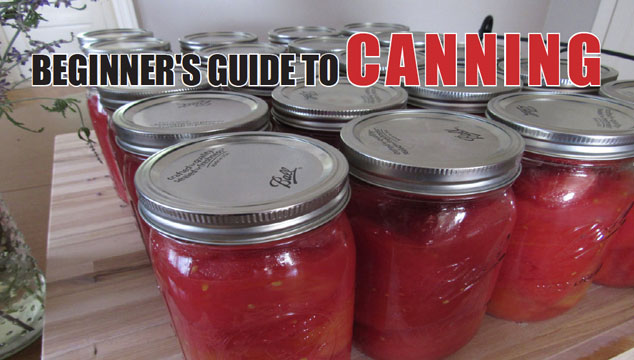
This guide will provide you with the information you need to get started home canning.
Supplies
You will need certain supplies for canning. There is an initial investment to get started but you can reuse the equipment for years. Plus you don’t have to buy new products. You can use stuff your grandma had or items you buy at a thrift store or yard sale.
Jar Tongs
This is the list you need to start shopping for:
- Pressure Canner: Make sure the seal is in perfect shape if you’re buying used. You can replace the rubber seal if needed. The canner also needs to have a pressure gauge and a relief valve.
- Jars in Varying Sizes: Wide mouth tend to be the easiest to use when you are canning large items like meats, apple slices, and chunky stews. Small mouth jars are great for jams, jellies, and soups.
- Bands: New is best but you can get away with used if they are in perfect shape. You don’t want any rust spots. These come in wide or regular as well. New jars will come with bands and lids.
- Lids: The one supply you should never buy used! You don’t want to risk the rubber seal being damaged. They are relatively inexpensive and worth the cost to buy new.
- Jar Tongs: They are an absolute help but not technically a necessity. Your grandma probably didn’t use them but she also didn’t have a washing machine…
The above list are the basics, but here are some additional items you will need for certain recipes:
- Canning Salt: Used for veggies and similar recipes.
- Citric Acid: Used with apples and some other fruits to prevent discoloration.
- Pectin: Needed for jams and jellies.
- Recipes! Check grandma’s cookbook or browse online. Try a variety to find the ones that your family loves.
Produce
Obviously, you need food to can. In this section, we will discuss fruits and veggies. It is important to keep in mind all food is prone to bacteria. In order to safely preserve that food, you must kill the bacteria before putting it on your shelf. Failing to do that can result in botulism. Oh yes, that nasty stuff! It is no joke and can be lethal. You absolutely must process the food to properly kill the bacteria.
With that said, the processing part can make some foods a little mushy. This means starting off with the best quality produce you can find. Here are a few tips:
- Choose fruits and veggies that are perfectly ripe or almost ripe if you can’t immediately preserve the food.
- If picking your own, pick in the morning when the fruits and veggies have their natural sugars locked in. As the sun heats up the produce during the day, the fruits won’t be as sweet.
- Don’t use any produce that is molded or blemished. Only use the best of the best. You want the food you preserve to taste as close to it’s natural state as possible.
- Don’t buy the produce or pick it if you can’t do the processing within 24 hours. Wait until you have the time.
- Of course organic produce is best but it isn’t a requirement.
Home Canning Terms
Here are some terms you need to be familiar with in order to follow various canning recipes:
Blanching: This is a term you will become very familiar with in home preservation. Blanching is the process of killing that bacteria we just talked about. Basically, it involves boiling the fruits or veggies for a few minutes before removing from the heat and immediately setting it in ice cold water. The blanching kills the bacteria and the cold water stops the produce from cooking any more.

Typically, most fruits and veggies only need to be blanched for about 4 minutes. Blanched apples, carrots, beans, and so on will be slightly softened but they won’t be cooked. When you open the jars to use the food, the fruits and veggies can be cooked until they are completely done or even eaten as is.
Syrups: With home canning, you have the luxury of deciding how much sugar your fruits are stored in. Think about the cans of fruit you buy in the store. They will indicate “light syrup” or “heavy syrup.” But at home you can customize this. Plain water is almost always an option as well.
Brine: This is the liquid that vegetables and meats are stored in. Again, you can choose how much salt you want to use. You can keep it light and barely noticeable or add some extra flavor. Keep in mind that too much salt is not desirable in a survival situation when water may be hard to come by. Excess salt can cause dehydration. Experiment with brines that are heavy with herbs that enhance the flavor of your vegetables without the risk of too much salt.
Canning Fruits
This is a basic guide to use for canning a variety of fruits. The process is generally the same when preserving all fruits in their raw, natural state. Fruits are high in acid and don’t require the use of a pressure canner. You can get away with a water bath canner.
This is a large pot filled with water to a point that will cover the tallest jar. It’s a good idea to use a canning rack that goes on the bottom of the pot to keep the jars from sitting down directly on the pot. This can prevent jars from breaking due to extreme heat or the bubbles that rise up during the processing.
- Gather your supplies such as jars, lids, bands, jar tongs, and sugar if desired.
- The fruit should be thoroughly washed. Cut into slices or chunks if desired. Remove seeds and stems.
- Dip your fruit in a bowl filled with a citric acid solution and then set aside.
- Fill a pot with water and add your fruit chunks or slices. Boil the fruit for five to ten minutes depending on how soft you want the canned fruit.
- While the fruit is boiling, start another pot of water and add sugar if using a syrup. You can choose to have a light or heavy syrup.
- Remove the fruit from the heat and use a slotted spoon to transfer it to your clean and sanitized jars.
- Ladle the hot syrup over the fruit into the jar until the liquid is about a quarter inch from the rim.
- Use a wet towel to wipe down the rim and the area where the band will screw on.
- Screw a clean band on each jar.
- Don’t be surprised if you hear a popping sound as the heat from the liquid inside the jar seals the lid.
- Place the jars into the water bath canner. The water should already be boiling. Use jar tongs to avoid getting burned by steam or splashing water.
- Let the jars sit for 8 to 12 minutes.
- Use the jar tongs to remove them and set on a dry towel.
- Allow the jars to cool. Check to see if the lids have sealed by pushing down on the center of each lid. If the center of the lid bounces it didn’t seal. You can reprocess the jars or place in the fridge to eat within a week.
- Use a permanent marker to write on the lid what type of fruit and the date processed.
Canning Vegetables
Canning vegetables follows pretty much the same process as the fruit. However, you will need to use a pressure canner for ALL vegetables. Vegetables don’t have the high acid that can kill bacteria.
Heat is the only choice and it must be hotter than the standard boiling temperature. This is why there is a need for pressure and more intense heat.
- Follow all steps outlined above, deleting step 2. You won’t need to add citric acid to your veggies.
- It takes some time to get the water heated in the pressure canner. Get it going early. When your jars are ready, place them inside the canner. Make sure to leave a little space between the jars.
- Put the lid on the canner and ensure it’s on tight with the pressure release valve in place.
- Keep an eye on the gauge. Every vegetable will require a different PSI for processing. Once your gauge hits the target PSI, turn down the burner. You will need to pay close attention for the first ten minutes or so. Watch to make sure the heat is just right and isn’t causing the pressure to rise too high.
- Processing times vary but expect them to range between 40 to 60 minutes.
- Once finished, turn off the burner and remove the canner to start the cool down process. DO NOT attempt to open the canner until the pressure is released. This can take another hour or more. You can help speed things along by using the pressure release valve. Use a hot pad to carefully pull the knob back towards you, which will cause the steam to point away. Don’t try this until the pressure has already started to go down.
- Once the gauge is at 0, you can release the lid on your canner and remove the jars with the tongs. Follow the steps above to check to ensure each jar sealed correctly.
On a side note, don’t be alarmed if you open your canner and find a jar has broken. Usually it’s caused by a tiny crack in the jar going undetected.
Safety Tips
Home canning is rewarding and, in general, safe. However, it’s important to know the signs of food that has spoiled and could be loaded with botulism or other dangerous bacteria.
- Before using a jar of food from your pantry, check the seal by pushing in the center. If it bounces, it’s no good. Throw out the entire jar. Don’t open it.
- If the liquid in the jar looks funky or excessively cloudy, it’s likely the food spoiled. Throw it all out.
- If you open a sealed jar and there is mold on the inside of the lid or on the food, toss it.
- Smell the contents. This can be tricky, but if something smells sour or has an odor that doesn’t quite feel right, throw it out.
Your health is too important to risk eating a jar of potentially lethal food. The old adage you should always adhere to is this; When in doubt, throw it out!
Doing your own canning at home is a healthy and efficient way to store quality food for your family. It is overall better than store bought. Canning shouldn’t be just for your grandmas anymore!