
Hey guys Brain & Terry here! Today we are finally going to be hooking up water at the property! This is one of those monumental accomplishments for us. We will finally have water to drink when we run out, to wash up when we get dirty, or to water when we plant different things as we work. Plus, it’s one step closer to having houses in here. We definitely want to get a well, but we aren’t exactly sure where it’s going to go yet. So, we will connect to the local water supply for now, and then this can be a good backup if something ever happens to our well.
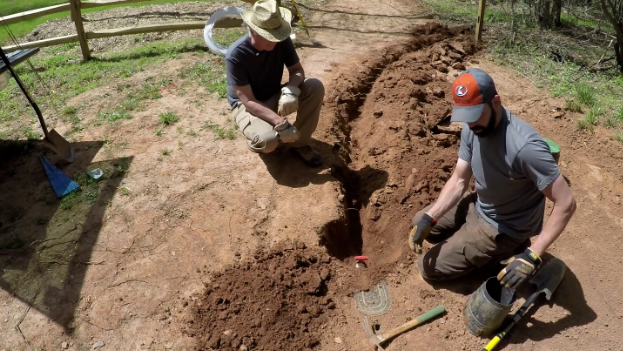
We start off by digging a shallow trench to where we want this temporary connection to be. It’s summer so there’s no need to bury it deep since it will be coming out soon. This is just getting us by until we can get a proper trench dug 300 feet back to the house sites.
In our area, the water company supplies us with a tap to tie into and a small junction box that houses that tap. The larger container is one we purchased at a local big box store to use for our temporary junction. Since we will be connecting a hose to it from time to time, we wanted room to work.
This new box has two holes for inlet or outlet use. We will only be using one of them for the inlet.
In order to make the connection to the existing tap, we need to dig up the box and remove it.
Once we have the tap box removed, we go to where we want our temporary connection to end up and mark that spot with the big box.
Then, we dig that hole out and finish digging our trench to that location so that we can cut our Pex water line to the proper length.
When we look closely at our water main, you can see that there is a plug in the hole to keep dirt and debris from getting in it.
This is easily removed with a straight blade screwdriver.
Before making any connections, we want to make sure that there is no dirt in the main line, so we double check by cleaning it with a rag.
The next step is to get out threaded adapter ready to lock down. We apply a few rounds of Teflon tape to the threads. This helps us get a nice, solid and watertight fit.
When doing this, you want to wrap in the direction of the threads, so it doesn’t unwrap when you start turning it in. You also want to keep it very tight. You don’t want sloppy loose tape on there.
After threading it in by hand, make sure to use some channel-locks to take it the rest of the way in. You don’t want any leaks, so make sure it’s a solid connection. Check it for leaks before you bury it. The last thing you want is to pay for water that’s running out underground.
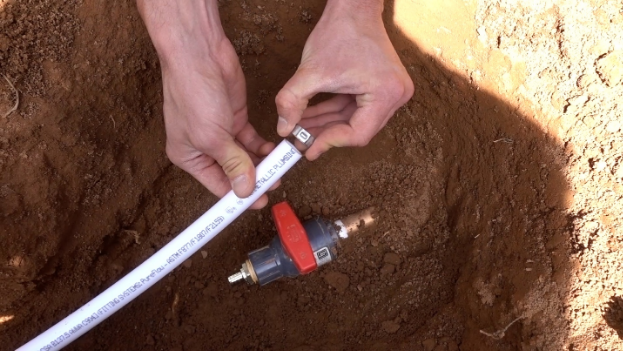
Here is where Px really shines. All we have to do to hook it up is slide a crimp over the line, slide the water line and crimp up on the adapter we previously taped and installed in the water main connection, and then use our handy dandy crimp tool. This one is from a company called Zurn. The white plastic dot on the side is actually an LED light that lights up blue when proper pressure has been applied to the crimp. That’s all there is to hooking up Pex! Super easy and actually a joy to work with, far better than a bunch of glue or flux.
Now it’s time to run the pipe the rest of the way up the hill. It’s so nice that the pip comes in giant rolls. We can make a long run without having to make any junctions. It saves a lot of time for sure!
Once I’ve figured out how long I need it, I cut the excess off using some PVC tubing cutters. I actually cut it a little long to make it easier to work with and get an exact measurement for my final cut.
Now, with it being easier to work with, I can see exactly where I want to have my spigot and mark that location to cut. This way, I can keep the spigot close to the top of the water box, making it easier to work with when connecting a hose.
Once that’s cut, I can install my thread adapter using the crimp and crimp tool again. The spigot is still not taped, it was just installed for a dry fit.
We do a quick test to see how things look…WE HAVE WATER!!!
Next up, we tape the threads of the spigot.
And then crank it down with a couple sets of channel-locks for a secure, dry fit.
Lastly, we reinstall the lid on the water box and start burying everything. Finally having water on the property is a huge step forward for us, and it was so easy to do with Pex. If you are looking to do some of your own plumbing work, definitely look into the Pex system. It’s truly super simple to use. It’s almost foolproof. People have even tested it by filling a section with water, capping both ends, and laying it outside, on top of the ground, in sub-freezing temperatures. It will freeze, swell up, and not break. Instead, when it thaws, it goes back to its normal size. Plus, the ability to run solid runs to each destination is a huge bonus. We both plan to run home runs to each tap in the house. The only real place for leaks will be at the end connection points. That way, whenever there might be a need to turn off a line for some reason, we can just turn off that one line. That’s definitely a lot better than turning off the entire house, haha.
We hope you guys and gals found this post to be helpful and entertaining. Be sure to check back soon as we keep moving forward on the property and share a some really cool tips we have learned along the way. Thanks for stopping by!