


Invented more than 2,000 years ago, the magnetic compass was a great advancement over stationary celestial compasses and sun dials on the ground. This compass was portable, and it worked day or night!
Initially used more for fortune telling and layout planning (feng shui) than for navigation, travelers soon discovered that they could find their way much better when bringing a compass along. Today, we can’t imagine backcountry navigation without this amazing invention.
Early Compasses
In Han dynasty China around 200 BC, chunks of magnetite (also called lodestones) were used as the first known compasses. These special rocks were (and still are) naturally magnetized iron ore. Dangled by a thin bit of thread, the stone would line up with north and south, pulled by the earth’s magnetic field.
As this technology advanced, compass makers began to use iron needles that were magnetized with a lodestone. These pivoting-needle compasses grew increasingly common, spreading through the Middle East and into Medieval Europe around 1300 AD.
If you are lucky enough to find and identify a piece of magnetite today, you can hang it from a thin thread in a windless environment to determine a north/south line. Using other navigational information, you can determine which side points north and mark it for future reference.
Float a Needle

Because of the metallic composition and movement of the earth’s core, our planet acts like a large magnet surrounded by a huge magnetic field with north and south poles. Thanks to the strength of this field, a free-spinning magnetized needle will line up with the north/south pull of this magnetism.
So if your compass gets lost in the backcountry or you just didn’t bring one (bad idea), it is possible to improvise a compass. But seriously, bring a primary compass and a back-up (like one of those little button compasses). The weight is negligible and the value is tremendous.
So you lost your compass or didn’t bring one – fine! Pull a needle out of your sewing kit or locate a short length of thin steel wire. If you happened to also have a magnet, you’re in business!
If it’s a dense strong magnet, rub it down the sewing needle at least five times (from eye to point each time), but if your magnet is weaker, like a flimsy flat refrigerator magnet, rub the needle at least a dozen times. You’ll treat the wire in the same way.
By rubbing the magnet in the same direction multiple times, you are causing some of the iron atoms to line up, thereby building a weak magnetic field. This one-way technique is much more effective than rubbing the magnet back and forth on the needle, which wouldn’t line up the iron atoms in the same way (or at all).
Once you’ve rubbed it the right way, your needle should now be magnetized. And since most of us don’t carry around magnets in the wild, here’s another way to get the job done. If you have any silk or wool (from clothing or other gear) rub the needle from eye to point 100 times against the fabric. Due to the static electric charge you will create, the needle will be weakly magnetized.
PRO TIP: Needles have recognizable “eyes” (the hole) and points, but a bit of wire won’t. When using wire instead of needles, mark it somehow so you know which end is your “north pointer.” You don’t need to paint it red, but some recognizable little bend or marking will really help you out.
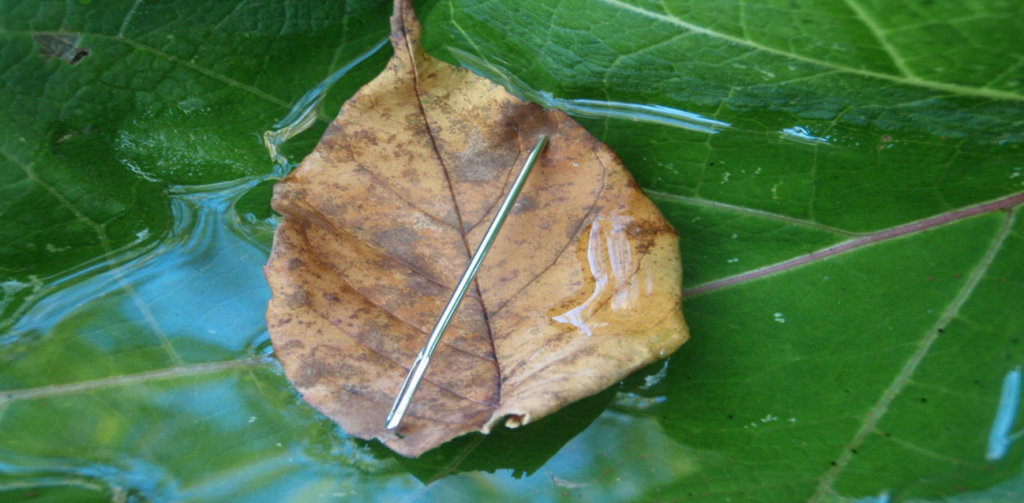
Once magnetized, place your prospective compass needle on a small leaf that can float and set it inside a bowl filled with water, a still puddle on the ground, or any other container you can improvise. If you can’t find a leaf that works, you can also use a thin flat piece of wood (something dry and rotten would be the most buoyant) or a chip of corky tree bark.
From your kit, you may even have a flat bit of foam or a flattened blob of candle wax. Just find something that floats with little chance of flipping over.
Once set up and floating, you’ll have to block the wind completely to get an accurate reading, and keep the floating needle in the center of the container (static attraction can pull it toward the edge and hang up your float). But if all went well, your needle will turn the float into a north/south alignment.
The needle eye will be pointing south and the needle point will be pointing north. This is due to the needle being positively charged and polarized. The needle point will naturally turn towards the strongest magnetic pole, which would be the North Pole in the Northern Hemisphere (and the South Pole below the equator).
Hang a Razor
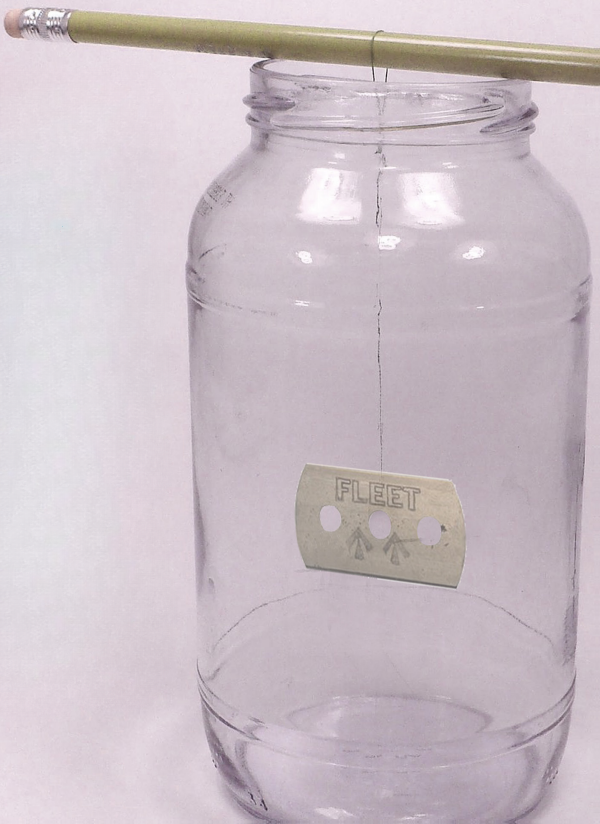

Is it too windy for a floating compass? No problem, we can take what we’ve learned and move it “indoors” by making a hanging compass inside a bottle or jar. Get a razor blade out of your repair kit (what, you don’t have that either?) and mark one end of it with “N” using a pencil, marker or scratching it on there with your knife (be careful when using one sharp object to carve on another!).
Using a magnet, rub the razor blade from your prospective “south” end toward the “north” end. Since you’re dealing with a lot more metal this time, rub a strong magnet more than a dozen times and a weak magnet more than 50 times.
Then find a bit of hair-thin sewing thread and tie a bit through the hole in the center of the razor blade. Lower the blade into a glass jar or clear wide-mouth drinking bottle and then tie the thread to a small stick that spans the mouth of the jar.
Set the jar on a solid surface and allow the razor blade to steady itself. If you magnetized it properly, the side marked north will be pointing north.
PRO TIP: If you’re lacking a razor blade, but you have needles – magnetize two of them and poke them through a thin piece of paper. Make sure that the needles are parallel, with the eyes and points on the same sides, and set the needles about a ¼ inch apart. Connect the thread to the paper and hang the pair of needles inside the jar. You could even hang three parallel needles, if needed, to overcome the twisting influence of the thread (something you don’t have to worry about in a floating compass).
Become a Survival Dispatch Insider …
We bring together survival enthusiasts and preppers to share skills and knowledge, so you can enhance your preparedness for emergencies and ensure the safety of you and your community.
The Results You’ll Get …
Our community, courses, and memberships are pretty special. We’re focused on the ways it will make a huge difference in your life.
Here are a few of the things you’ll be able to do as a member of Survival Dispatch Insider …
1) Improve your emergency preparedness by learning survival skills and strategies from experienced preppers.
2) Build lasting connections with like-minded individuals that share your passion for safety and readiness.
3) Access a wealth of knowledge and resources to assist in protecting you and your community during unexpected situations.
Click HERE to get started.