

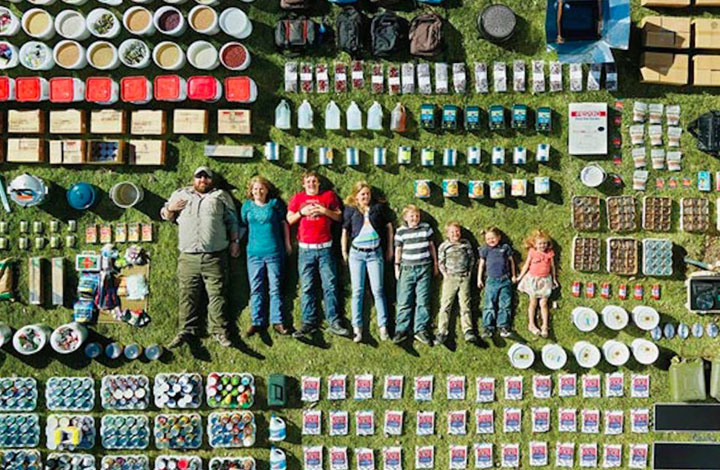


What is Prepping?
Usually when someone hears the word ‘prepper’ they think of a ‘survivalist,’ but even then, their perception may be wrong.
‘Prepper’ is not defined in the Webster dictionary, but we know it means we are prepared. ‘Survivalist’ is defined as a person who practices survivalism. Survivalism is defined as an attitude, policy or practice of survival. And survival is defined as the act or fact of living longer than another person.
Very Beginning
So how do we begin? Well, first we must have the right attitude, we must decide what we are going to be prepared for. This will depend somewhat on where you live; tornado, hurricane or a power outage could impact anyone.
You should start small – plan on having enough food for 5 days. You can easily accomplish this by adding an extra box or can of something you normally eat each time you go shopping and putting it in a separate box or cupboard.
Adding water can be done a number of ways, mylar water bags that go into a cardboard box, a water bob that you put into your bath tub and fill, gallon jugs or cases of water. For six plus months, don’t rely on water in plastic bottles as some can leach chemicals from the plastic into the water.
6-12 Months
As you start moving to six to twelve months, a useful tool is one of the 12-month food prep calendars, usually found on websites associated with members of the Latter Day Saints (LDS) church. These recommend what to buy each month to add to your stores, including non-food items such as toilet paper, soap, etc. If you are a coupon collector, then these can help you build supplies and save money.
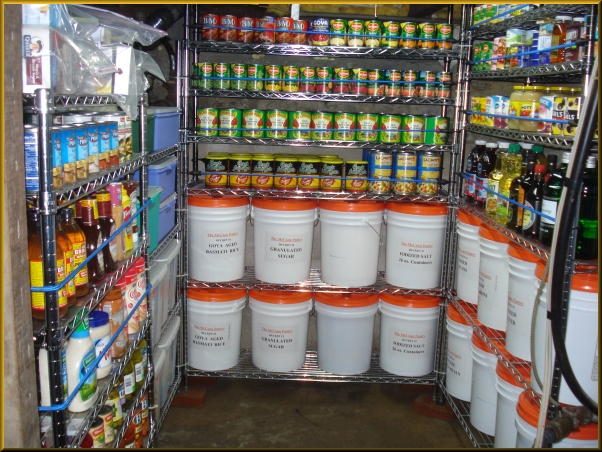
One challenge you can face when aiming for a year’s worth of supplies is storage. You might have to get innovative, but if you are using shelves make sure they are heavy duty.
If you have a garden, grow things that you are able to can. Almost all vegetables can be canned. Canning is not difficult, just invest in a good pressure canner and get the Balls Preserving book and follow instructions.
Make sure the jars are cleaned well before using. A dish washer on hot and heated drying works, or you can use a large container and a hot water ‘bath.’ It’s easy to determine if a seal on a jar has worked as the lid will be sucked in.
Canned food will keep almost indefinitely. If the lid ‘pops’ out, do not eat. Some areas have farms or orchards where you can pick your own vegetables or fruit, saving you considerable cash against store bought goods, and much fresher. You can also look at farmers’ markets.
You can also can meat, which is a good way to store meat for a long time without getting freezer burn – plus it doesn’t matter if you lose power.
Years
For longer storage, you are looking at having items packed in cans or sealed in mylar bags. Items in store bought cans will last long after their ‘use by’ date, as long as the can isn’t bulging. Buying case lots at bulk stores such as Costco, Sam’s etc. can be a good way to add to your stores. You will find #10 cans of tuna and some vegetables at the warehouse stores.
#10 Cans
Another, often overlooked, place for #10 cans of goods is the LDS Home Storage Center. Every large city has them and anyone can go and purchase from them. They carry #10 cans of carrots, apple slices, several types of beans, flour, nonfat milk powder, macaroni, oats, sugar, wheat and other items.
You can order online and have items shipped or go in person, which is much cheaper obviously. The list of items they carry and prices for pick up can be found here. You can by individual #10 cans or by the case (6 cans per case) and it’s an easy way to quickly build some food stores. Their site also lists storage duration and other useful information.
Someone has also put a cookbook together with recipes using items available from the Store House.

Mylar
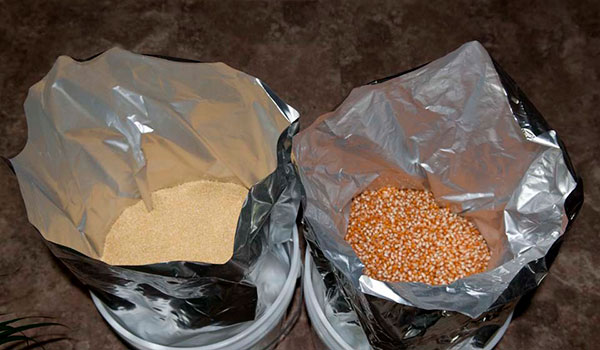
The ‘next level’ for food storage is bulk buying items such as rice, grains and legumes and repacking into mylar bags for 20-30+ years of storage. If you have a membership to Costco, Sam’s, etc., you can pick up 25lb or 50lb bags of rice and beans and 20lb boxes of oats fairly cheaply.
You can get mylar bags and oxygen absorbers from places like www.dicountmylarbags.com or even the LDS Home Storage web site. You should use bags that are at least 5mil thick, so read carefully when you see deals on Amazon or other sites. The ones I’ve seen are only 3mil thick.
You do not need an expensive heat sealer to seal the bags; place the bag over a piece of 2×4 wood and use an iron. Make sure you have removed most of the air before putting the oxygen absorber in and sealing the bag. (Do not use an oxygen absorber with sugar. You will end up with a very large sugar ‘brick.’)
Size
Before buying mylar bags, decide what size you want and what you are going to store them in. Many people use 5-gallon mylar bags placed into 5-gallon food grade buckets. When stacking put 2×4’s across the top to spread the weight of the next layer.

The disadvantage with 5-gallon buckets is that you are opening 5 gallons’ worth of food. If you are a small family, or single, you might want to consider 1 or 2-gallon bags. You can place several in a 5-gallon bucket or use a heavy-duty plastic bin.
Another advantage of the smaller bags is that you can give away a small bag to someone in need without giving away the fact that you have 5-gallon bags stored.
One important note: use a permanent marker to write the contents and date packed on the bags BEFORE you start to pack other food or put them away.
Conclusion
Obviously, we’ve only looked at food storage in this article. There are many other areas that we should consider to be prepared for situations that we may encounter or that could impact where we live. These we will address in other articles, and you can find more information in the Survival Dispatch Insider magazines.