


Anyone can start a fire on top of the snow. Just grab some tinder and a fistful of twigs, form them into a cone or some other fire friendly shape, strike a match under your fire lay, and everything starts out fine. The flames climb and the fire grows. All systems seem normal until the embers start to form.
Water starts to soak into your fire as the snow warms up underneath. Just as quickly as the fire started, you’ll be looking at a small tangle of soggy black sticks. That’s the problem with maintaining a fire on top of the snow but there are two solutions. First dig down below the snow, second is to protect the fire from the snow. I’ll go into details of each step below:
#1 Dig Down Deep
Forget about burning a fire on top of the snow when the white stuff isn’t bottomless. Use a shovel or some kind of improvised tool to dig down through the snow until you hit the ground. Set up your fire as you normally would but skip the traditional fire pit. The pit is likely to be difficult to dig in the frozen soil, and even more likely to fill with water as the nearby snow starts to melt. Just look down at your feet if you’re not sure whether you should dig a pit or build something else. Build a fire on the top of the snow if it’s deep enough that you’re wearing snowshoes.
#2 Build A Fire On Top Of The Snow
There are a few steps to building a fire that won’t go out on stop of the snow. Here are some things to consider:
Build A Raft
Building a fire on top of the snow is the best option if it’s more than a few feet deep and you lack the tools or time to dig a large pit. The trick to making this work is to build a raft or platform of some kind. Use a fireproof or fire resistant surface that can allow a bed of embers to form underneath your burning firewood. The raft can be made from split pieces of firewood, chunks of rotten wood, or whole logs of fresh cut live wood. Live wood is the best option as the logs will retain enough moisture to resist burning for several hours.

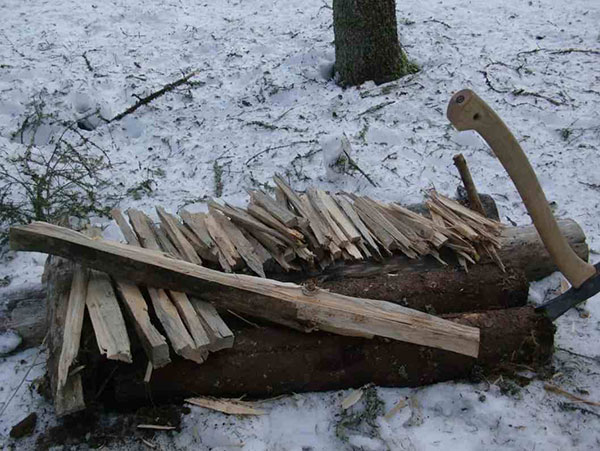
The logs will also block the moisture from the melting snow and prevent this water from wicking up into your fire. Keep an eye on the wood used to build the raft as the fire burns down. Prepare replacement materials before you need them, especially if you plan to burn the fire for many hours. Sooner or later, you’ll burn a hole through the bottom of the log raft. Whole pieces of green wood are your best choice for a raft. Thin planks of dry wood are a poor choice as they will burn through quickly. Use a shovel or a piece of bark as a scooper to move the fire or make some wooden tongs to transfer embers to the new raft.
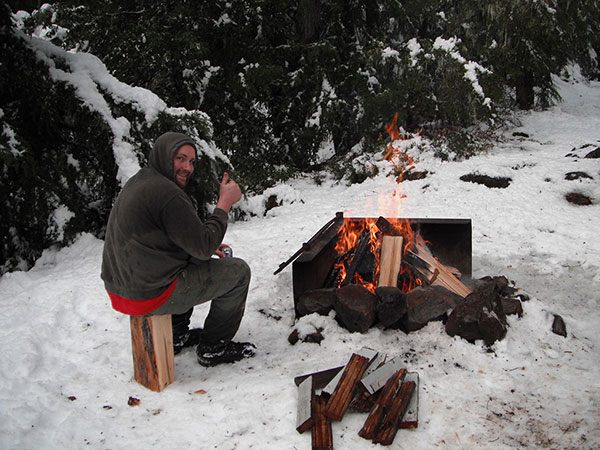
For something with a little more longevity, try using manmade materials for your raft. Something that’s fireproof like a flat piece of metal can be placed atop a platform of logs or rocks. This is so the hot metal doesn’t melt the snow lying under it. You can even transport it from one campsite to the next if this piece is small and lightweight.
Add A Reflecting Wall
We end up losing most of the heat of any campfire since it rises. But this doesn’t mean that we have to lose everything. With an effective reflector behind your blaze, a small fire can produce as much radiant heat as a large one. The reflecting wall is a flat, angular, or horseshoe shaped wall built behind the fire. It should be about two to four feet high and as wide as needed depending on the size of the fire and your group.

If snow wasn’t a factor, you could build the wall from rocks, mud, or packed dirt. Build your wall from wet or green lengths of firewood if the snow ends up covering most of those materials. Use existing trees or drive stakes into the snow to create a frame to hold up your reflecting wall. Use multiple stakes to create a stacked wall that can double as a drying rack for firewood. Pull the pieces out of the wall as they dry and replace them with more wet or green wood. Make the wall as smooth as possible for the best heat reflection.
Be Careful With The Location
One final issue for maintaining a fire in the snow is the location of your raft or pit. You may instinctively try to build your fire under the protection of overhanging evergreen boughs like pine or spruce. This is fine if they aren’t snowy but watch out if they’re covered. Some of the radiant heat of your fire will go straight up and turn the snow on those branches into slush. And guess where it will fall? Straight down and right on top of your fire.

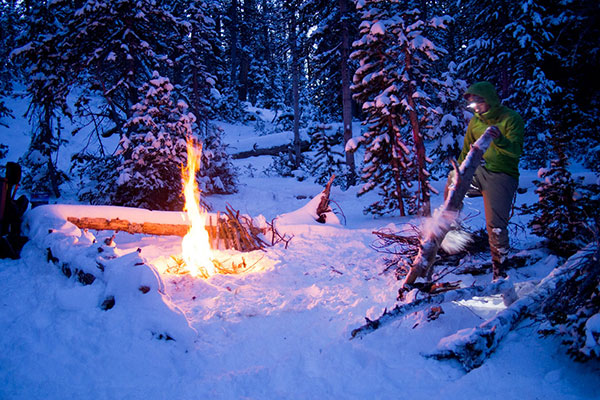
It happened in Jack London’s famous short story, To Build A Fire, and it can happen to you. A better choice would be to seek shelter near a rocky outcrop or boulder that can block some of the wind. Also a thicket of short brush for wind protection will work too. If your situation allows it, the best option is to build a shelter first. Even a simple lean-to can act as an excellent heat reflector, especially when used in tandem with a reflecting wall. Sit with your back toward the lean-to interior with the fire in front of you and the reflector on the other side. This creates a micro-climate of warmth, with you sitting happily in the middle.
Conclusion
There are some extra steps for building a fire in the snow whether you’re building on top or digging down below it. Be sure to add these preparations and the necessary tools into your plans. Snow should certainly never stop you from building a fire. You can have a necessary fire laid out in the snow and protected from melting water.