


It was my first archery deer season since I was just a boy, and I had to get creative. I now own 10 acres of land, but there is not a single tree on the property that is ideal for a tree stand. I did not care to put up a box stand, so that left me with the venture of building a ground blind. I knew I needed to get off the perfect shot if I wanted to ensure that a wounded deer would not end up on my neighbor’s land.
I had been practicing for months to ensure I was accurate. However, I knew that I had to hit just above the heart if I wanted to drop the deer in its tracks. This meant I had about a three -inch area to hit. I was good out to about 30 yards, so my blind would have to be within that range of my target animal. It would need to be the perfect ground blind. In this article, we will discuss how to build the perfect ground blind using only natural materials.
Selecting A Location
To have the perfect ground blind location there are several variables to consider. The first and probably most important is proximity to both animal signs and resources. On my property you can see several deer trails running through the tall grass. There are also bedding areas where deer lie down to sleep. I selected a location that was within 15 yards of both a deer trail and a bedding area. In addition, the trails were leading to our pond for water. I placed my blind about 20 yards from the edge of my pond.
Other deer signs include scat, tracks, rubs and scrapes. There were tracks all over the bank of the creek, so I knew they were stopping to drink. I also found a scrape under an apple tree that had been recently worked over. All of these signs were within my shooting range. Windage and sun direction are also important. I set up my blind so that I would primarily face North. This way, the sun was never fully in my eyes. In addition, the winds blew in from the North across the pond. With the wind in my face, the deer would not be able to pick up my scent. I had the perfect location.
Building a Frame
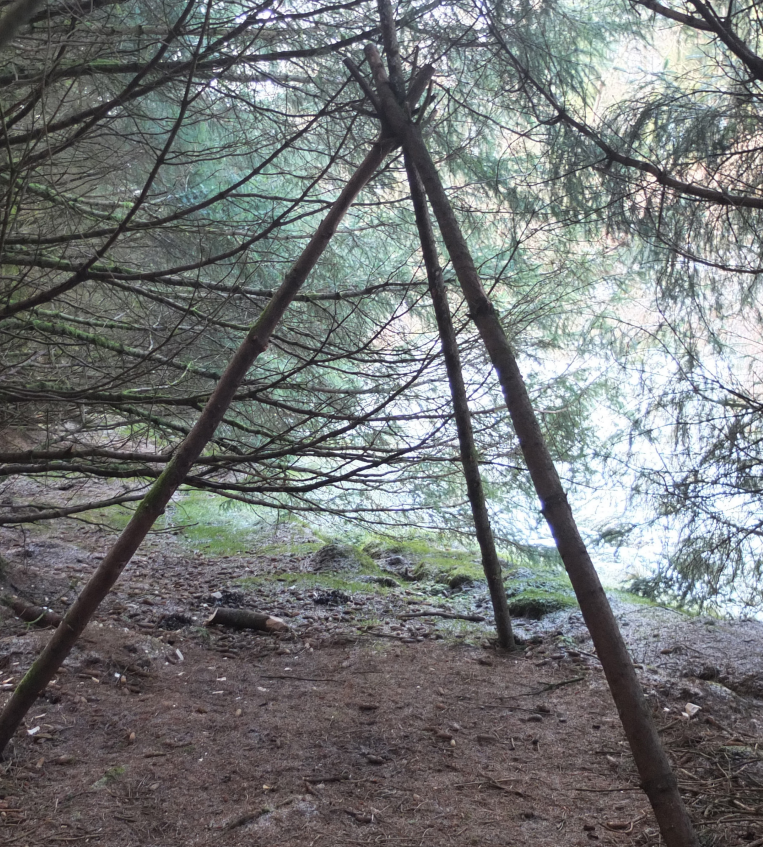

Any good blind will need some sort of frame to hold the vegetation in place. The more coverage you can have, the better. You can do a one or two-sided blind, but your back side would be exposed. This means that animals coming in from behind would be able to see any movement. Your best bet is a blind that covers you from all sides. I chose a teepee style three pole frame for my blind. The flat side of the triangle was facing directly North with the point facing South. This would give me a wide shooting lane to the North with plenty of coverage to the rear.
For the construction, I used three maple poles about 10 feet long. This gave me a strong structure that would completely surround me. For this frame, I simply lashed the poles together near the top, raised up the poles and spread them out at the base. I knew my frame would not blow over in the wind. Next, I attached sticks across the frame pieces at several heights. I was sure to leave a shooting window on all three sides along with a door to the rear. Before I finished, I placed a wide log inside for a seat. This was to verify that I could rotate 360 degrees with my bow in hand to make a shot. The frame was complete.
Adding Camouflage
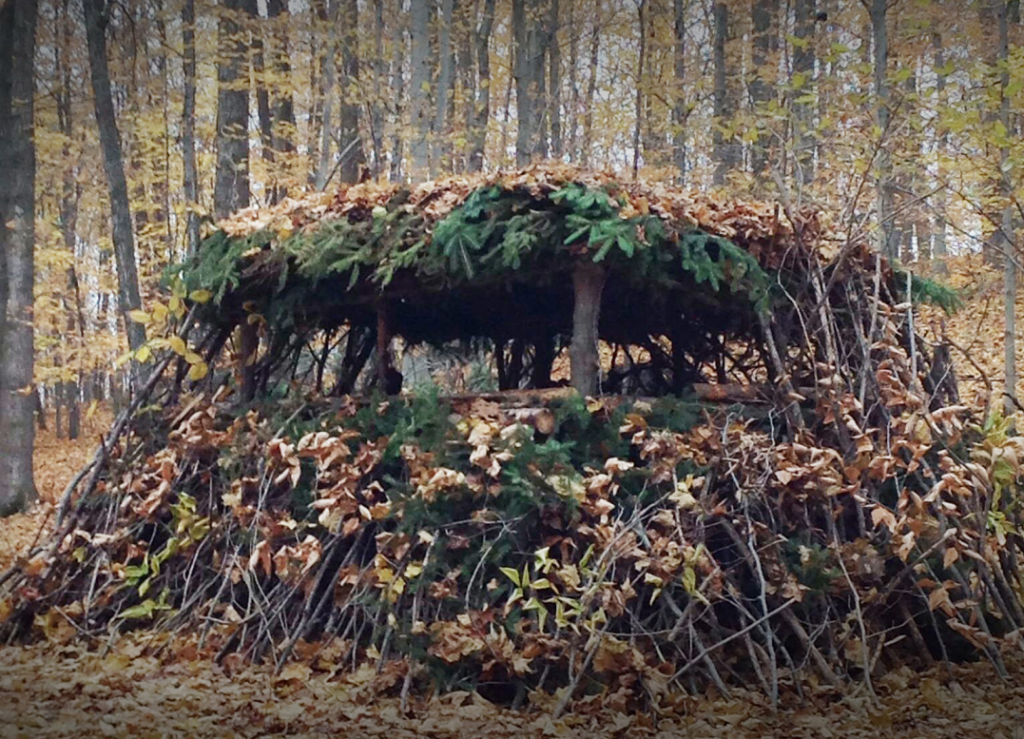

I worked my way around all three sides of the frame and built the foliage up to my shooting window. Then came the really tough section. Above the shooting window was a small pyramid. I had to spend a great deal of time getting the branches tucked in properly, so they would not fall out. For a door, I cut a five-foot flat branch to lean against the opening once I was inside. To test out my blind, I put my son inside wearing bright clothing. I noticed that I could not see him from some angles, but from others I could. This meant more branches needed to be added. I kept building until I could no longer see my son from any angle.
Final Thoughts
A good ground blind should take you one afternoon to build properly. However, the benefit is that it can allow you to hide from your prey just about anywhere. When I was finished, my blind just looked like a huge pile of leaves. That season I had several deer come within bow range of my blind. It worked just as I had hoped. A good ground blind can ensure that you get your kill. However, you must remember that you are directly in the sight line of your prey animals. A bad ground blind can ensure that you will be unsuccessful. Keep building until you are completely satisfied, and you can be sure you have a fun and fruitful hunt.
This article was originally published in Survival Dispatch Insider magazine Volume 2 Issue 8.
=====
Become a Survival Dispatch Insider …
We bring together survival enthusiasts and preppers to share skills and knowledge, so you can enhance your preparedness for emergencies and ensure the safety of you and your community.
The Results You’ll Get …
Our community, courses, and memberships are pretty special. We’re focused on the ways it will make a huge difference in your life.
Here are a few of the things you’ll be able to do as a member of Survival Dispatch Insider …
1) Improve your emergency preparedness by learning survival skills and strategies from experienced preppers.
2) Build lasting connections with like-minded individuals that share your passion for safety and readiness.
3) Access a wealth of knowledge and resources to assist in protecting you and your community during unexpected situations.
Click HERE to get started.
=====