


SDN has moved!
Subscribe to our new @SurvivalDispatchNews YouTube channel

When in a survival situation, you often see experts focus on food right out of the gate. Why is that?
It is said that you can live three hours without fire or shelter from the elements, three days without water, and three weeks without food. So why does it seem like every survivalist is focused on food? Can you not just wait it out until you find help?
The answer is that food does more than just keep you alive. As your body goes without food for an extended period of time, it starts to cannibalize itself for energy.
The body starts by burning fat reserves, and then moves on to muscle mass. This makes the person weak and clumsy. It can be very dangerous to be trying to survive while weak and clumsy.
Then the body starts consuming organ matter including brain matter. This makes the person feel sick and confused. They sink into a deep depression, and memory loss is common. As this happens, it becomes more likely that a person could make a deadly mistake or give up entirely. In addition, food boosts morale.
When you are struggling to stay motivated, a good meal is the best thing to keep you going.
There are plenty of wild edibles that you can easily collect for food. However, they rarely have the calories, carbohydrates, fats, and protein you need to keep going. You can also hunt, fish, or trap for the protein your body needs.
However, you expend a huge number of calories hunting for meat every day.
Without refrigeration, most meat and grain products would go bad within a few days. This is the real issue. If you can find ways to preserve these foods, you can hunt once a week instead of once a day. In this article we will discuss how to make preserved survival foods that will last without refrigeration.
Preservation Methods
There are several different ways that a person can preserve foods long term. However, those options are limited in a survival scenario.
- You can freeze meats and other foods, but this is difficult to maintain without electricity in most climates.
- You can pickle or can various fruits, vegetables, and meats. However, rarely will you have the jars and tools needed for this in a survival scenario.
- You can preserve these foods in advance, but they are hard to carry with you if forced to bug out.
This leaves various different ways to dry out food. All of the most effective long term preservation methods for survival require a food to be dried, salted, and kept in a cool, dark place.
Survival Food 1: Hardtack
This dense cracker is a staple of our survival stockpile as it can last for decades. You can first see examples of hardtack being used by the ancient Egyptians as a ration for their soldiers.
Hardtack is again heavily mentioned during Civil War histories for exactly the same purpose. In addition to lasting as long as it does, hardtack provides a healthy dose of the carbohydrates needed for a soldier to keep marching.

You can also make hardtack into large round disks, and they are hard enough to serve as a plate for other foods.
The one downside to hardtack is how hard it actually is. It takes some getting used to, but not to worry, I got over this hurdle by the second piece. To soften hardtack, people have been known to dip it in water, milk, beer, or wine. It can also be broken into pieces and used as dumplings in a stew or soup.
Any combination of herbs and spices can be used to make hardtack perfect for your taste. In addition, wet ingredients like honey can be used, but do make the hardtack spoil faster. I typically just stick with plain salt.
How to Make
The recipe is very simple if you take the time to make some before you ever need it for survival. Start with two cups of standard flour in a mixing bowl and add two tablespoons of salt. The salt helps to draw moisture out of the biscuit.
Then, start adding water little by little and mixing it into the flour. You just want to add enough water to turn it into a sticky dough. Mold it into a ball and move it to a floured table.
Next, you will need to roll it out with a floured rolling pin. You will likely need to add more flour to the dough ball to keep it from sticking to the rolling pin.
Do not knead the dough as you do not want to create any gluten within the dough. Roll it out into a sheet that is roughly ¼ inch thick. From there you can cut the sheet of dough into whatever shapes you like. You can cut it into squares, or use a cookie cutter for circles. Try to stick to a size and shape that would not break in a hiking pack.
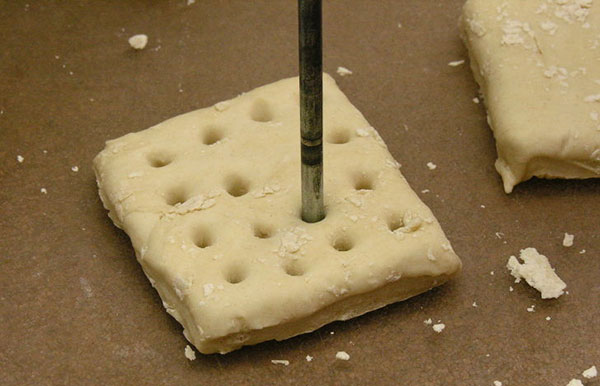

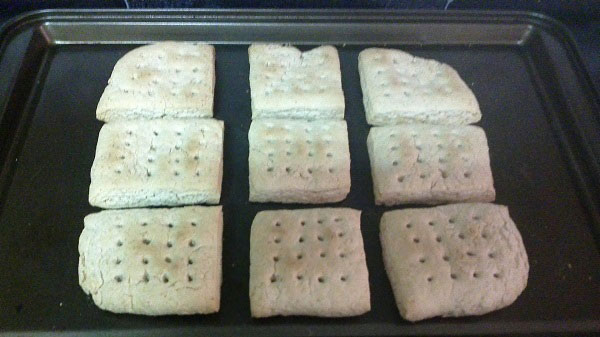
Preheat your oven to 250F. Move your pieces of dough to an ungreased baking sheet. Next you will need to poke holes all over the dough with a fork.
This allows all of the moisture to escape for an even bake. Set your timer to two hours. Once the timer goes off, flip over all your pieces and bake for another two hours. After four hours of baking, move the biscuits to cooling racks until they are cool to the touch. Then move them back to the baking sheets to bake for another two hours on each side.
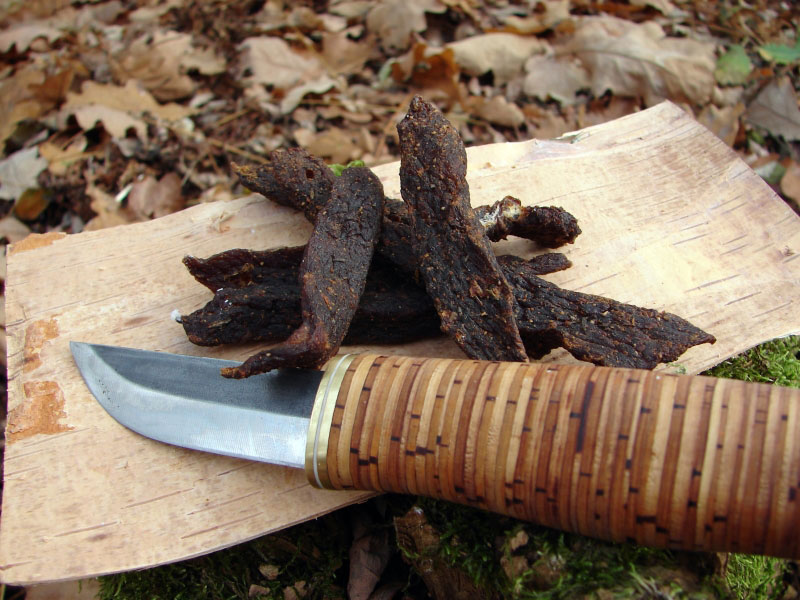
Survival Food 2: Jerky
This dried product can be made from meat, fish, or even fruit. However, the most common version is making it from beef, pork, or venison.
How to Make
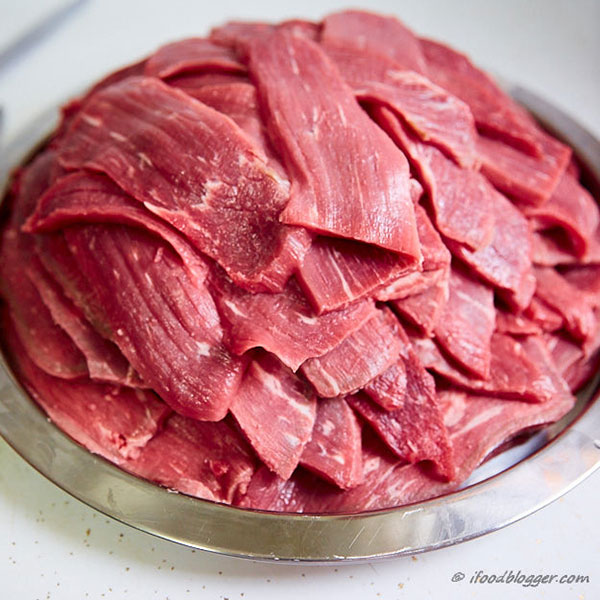
You will need to start the process by removing all of the fat and sinew from the meat before you slice it.
If you are making jerky in your kitchen, a meat slicer is helpful. Otherwise you can use a knife. Cut your meat across the grain as thin as you can. It will need to be less than ¼ inch thick for it to dry properly.

Once all of the meat is sliced, it is time to season it. Using a marinade overnight can add additional flavor. However, it can add to the drying time as well. I typically just sprinkle it with salt and pepper.
Drying
For the drying process, you have two options. If you are in the wild then you will need to put up a tripod over a fire. Let the fire burn down to coals, and then test the temperature. You should be able to hold the palm of your hand over the coals at the height of the meat for roughly five to ten seconds. This will ensure that it dries but does not cook.
If the meat cooks, it will spoil too quickly. You can build a rack at the right height for the meat, or you can string it onto cordage and tie it to the tripod. For further insulation, you can wrap a blanket or tarp around the tripod. Just be sure not to let it melt or catch on fire.
If you are at home using your oven, just set your oven to 175°F. You will need to use racks on your baking sheet to let air get to the bottom of the meat as well.
The drying process will be a little different for every batch you make. The thinner pieces will be done before the thicker ones. You can start checking your jerky after six hours, but it normally takes eight to twelve hours.
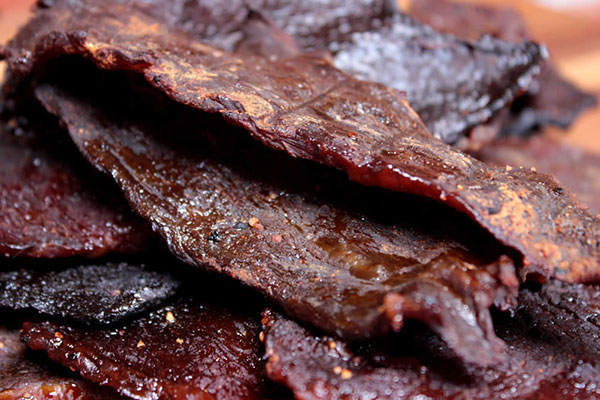

The jerky is done when no moisture can be squeezed out of it. When bent, it should crack but not break completely apart.
Survival jerky will likely be harder and tougher than store bought jerky. This is because we need it to stay preserved longer. Continue to remove the pieces that are finished, and leave the others to dry longer.
Jerky is the perfect protein to have on hand when refrigeration is not an option. It can stay preserved for six months in ideal conditions.
Survival Food 3: Pemmican
This funky concoction was first invented by Native Americans. They needed a balanced meal to send with scouts and hunting parties.
This product combined fat, jerky, dried fruit, and nuts for the sugars and proteins needed to stay out for weeks. The right batch can last for decades if preserved properly. The combinations that last the longest leave out the fruit and nuts and just stick to meat, fat, and spices.
How to Make
To get started, you first need some kind of meat jerky. See the above section for making this product.

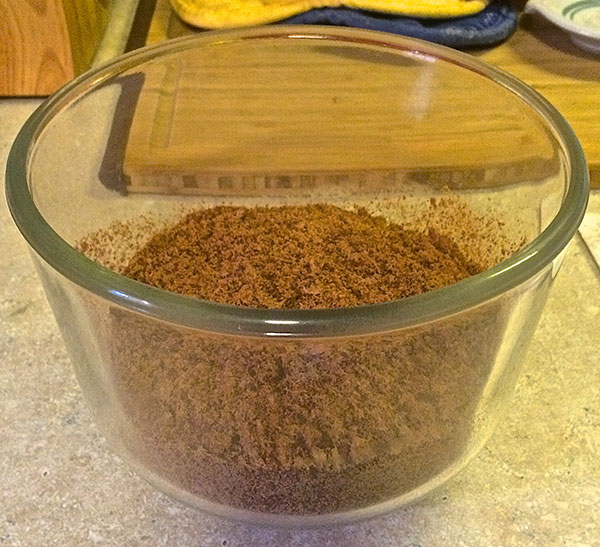
Jerky powder (image via Survival Sherpa)
Once you have the jerky, you will need to break it down to a powder. This can be done with a food processor or with a mortar and pestle. You will next need to render some animal fat. Any animal fat will do, but beef and pork seem to have the best flavor.
Of course, in the wild you would use fat from the animal you killed for the jerky. To render the fat, simply add it to a pot and cook on low to medium heat until it becomes a liquid. Be careful not to let it burn.
If you want to add dried fruit or nuts to the jerky, this is the time to do it. Make sure you break down the fruit or nuts to a fine consistency so the pemmican will hold together. Also, add any salt and spices you would like to use at this time.
Remember that salt and spices will not affect the shelf life of pemmican, but nuts and fruit will make it spoil faster. Once you have everything evenly mixed in a bowl, slowly add in some rendered fat. Add a little at a time and keep mixing. You want to add just enough for the mixture to start to clump up, but not enough to make it watery. Once you have added the right amount, mix it thoroughly so that all of the mixture is coated in fat.

Shaping and Storing
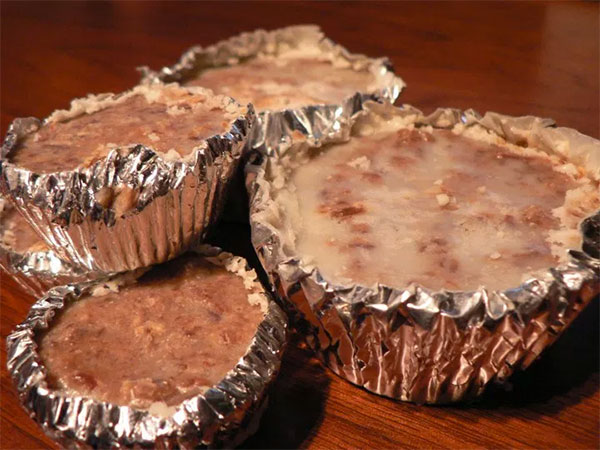
To mold your pemmican, you have a few options. When I make pemmican in my kitchen, I place a sheet of plastic wrap over a muffin tin. I then add a large spoonful of the pemmican to the center of one of the cups and press it down with a small glass.
This compresses it into a disc shape. I can then fold over the plastic wrap and it is ready to store. Depending on your options in the wild, you may need to compress your pemmican inside a sheet of cloth.
You can add your pemmican to one side of the cloth, fold it over the top, and then compress it with a rock or board. It does not need to be in an airtight container to keep, but you will need to keep it away from bugs and other animals.
Store it in a cool, dry place and it should last for months or even years.
Final Thoughts
Survival is a taxing experience no matter what. However, you can make things easier on yourself with a little planning and preparation.
Know in advance how to preserve your food, and have everything in place to preserve that food before you go hunting or fishing. Once you kill an animal, the clock is ticking.
You only have minutes to start the preservation process before the meat starts to spoil. In addition, do not wait until your life is on the line to try out these preservation methods.
Get some supplies and try it out in your kitchen or over a campfire. It will ensure that you are ready when you really need to use these methods, and it will give you a supply of preserved snacks to keep around your home as well.
=====
Become a Survival Dispatch Insider …
We bring together survival enthusiasts and preppers to share skills and knowledge, so you can enhance your preparedness for emergencies and ensure the safety of you and your community.
The Results You’ll Get …
Our community, courses, and memberships are pretty special. We focus on the ways it will make a huge difference in your life.
Here are a few of the things you’ll be able to do as a member of Survival Dispatch Insider …
1) Improve your emergency preparedness by learning survival skills and strategies from experienced preppers.
2) Build lasting connections with like-minded individuals that share your passion for safety and readiness.
3) Access a wealth of knowledge and resources to assist in protecting you and your community during unexpected situations.
Click HERE to get started.
=====